A daisy can change the feel of a plain fabric pouch, a tote pocket, or a cushion corner without covering much of the fabric underneath. This daisy flower crochet applique pattern combines a yellow center, eight white petals, and two green leaves on a separate stem.
Because the pieces are joined after crocheting, you can position the leaves at different heights or give the stem a gentle curve when sewing it onto your project. You can also use the flower head alone where a complete stemmed motif would take up too much space.
There are two stem options: a narrow slip-stitch version and a wider single-crochet version. Choose the one that suits the surface you want to decorate.
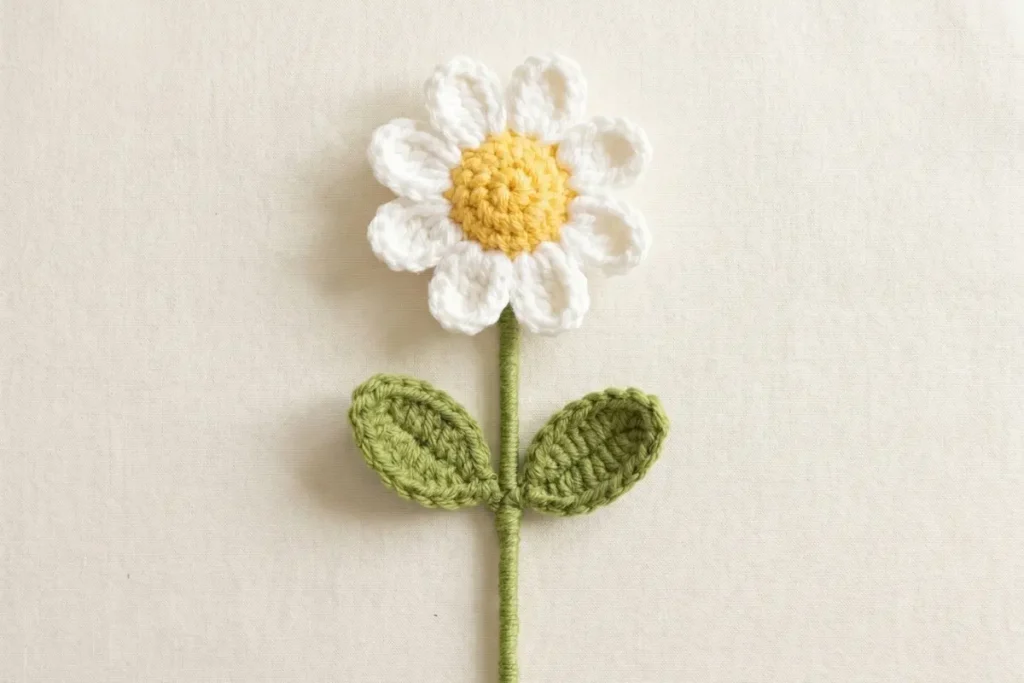
Choose the Placement First
Before starting, look at the item that will receive the daisy. A motif placed on a pocket should not obstruct its opening, and a flower near a bag handle needs enough space to avoid repeated rubbing.
If the finished item will be washed, choose yarn with care instructions compatible with the background fabric. Similar yarn thicknesses across the center, petals, and leaves will help keep the parts in proportion.
For a nature-themed arrangement, you could pair the daisy with the crochet butterfly pattern, using its appliqué option without the keyring hardware.
Materials
- Worsted-weight yarn, category 4, in yellow, white, and light green.
- A 3.5 mm crochet hook, or a size suited to your yarn and tension.
- Yarn needle.
- Scissors.
- Optional stitch markers for identifying the petal positions.
Skill level: Confident beginner. The project uses basic stitches, joined rounds, crocheting around a foundation chain, and simple sewing.
Finished size depends on yarn and tension. Compare the completed flower head with its intended placement before making the stem and leaves.
US Crochet Terms
| Abbreviation | Meaning |
|---|---|
| ch | chain |
| sl st | slip stitch |
| sc | single crochet |
| hdc | half double crochet |
| dc | double crochet |
| st / sts | stitch / stitches |
| MR | magic ring |
The Craft Yarn Council’s crochet abbreviation guide is a useful reference if you need to check a stitch name or compare US and UK terms.
Beginning chains and joining slip stitches do not count as stitches. Work through both loops unless a section specifies otherwise.
Daisy Flower Crochet Applique Pattern: Center and Petals
The yellow center is worked in two joined rounds. The white petals are then worked directly into its outer stitches.
Yellow Center
Round 1: With yellow, make a magic ring. Ch 1 and work 8 sc into the ring. Pull the ring closed and join with a sl st to the first sc. (8 sts)
Round 2: Ch 1. Beginning in the same stitch as the join, work 2 sc in each stitch around. Join with a sl st to the first sc. (16 sts)
Fasten off yellow.
Check that there are sixteen stitches around the outside. Do not include the joining slip stitch or beginning chain in that count.
Eight White Petals
Attach white with a sl st in any stitch of Round 2.
Work the first petal into that same stitch:
(Sc, hdc, 3 dc, hdc, sc).
All seven stitches belong in one yellow base stitch.
Skip the next yellow stitch.
Continue around, working (sc, hdc, 3 dc, hdc, sc) in the next stitch and skipping the following stitch.
Make eight petals in total, including the first one. After the eighth petal, skip the final unused yellow stitch and join with a sl st to the first white sc.
Fasten off and secure the yarn ends.
Count check: Eight base stitches hold petals, and eight base stitches are skipped. Each petal contains seven stitches, giving 56 petal stitches altogether.
There is no extra slip stitch between petals. The final join closes the round.
Visual Guide: Eight Petal Repeats
Check the sixteen yellow base stitches and the alternating petal-and-skip repeat before making the leaves.
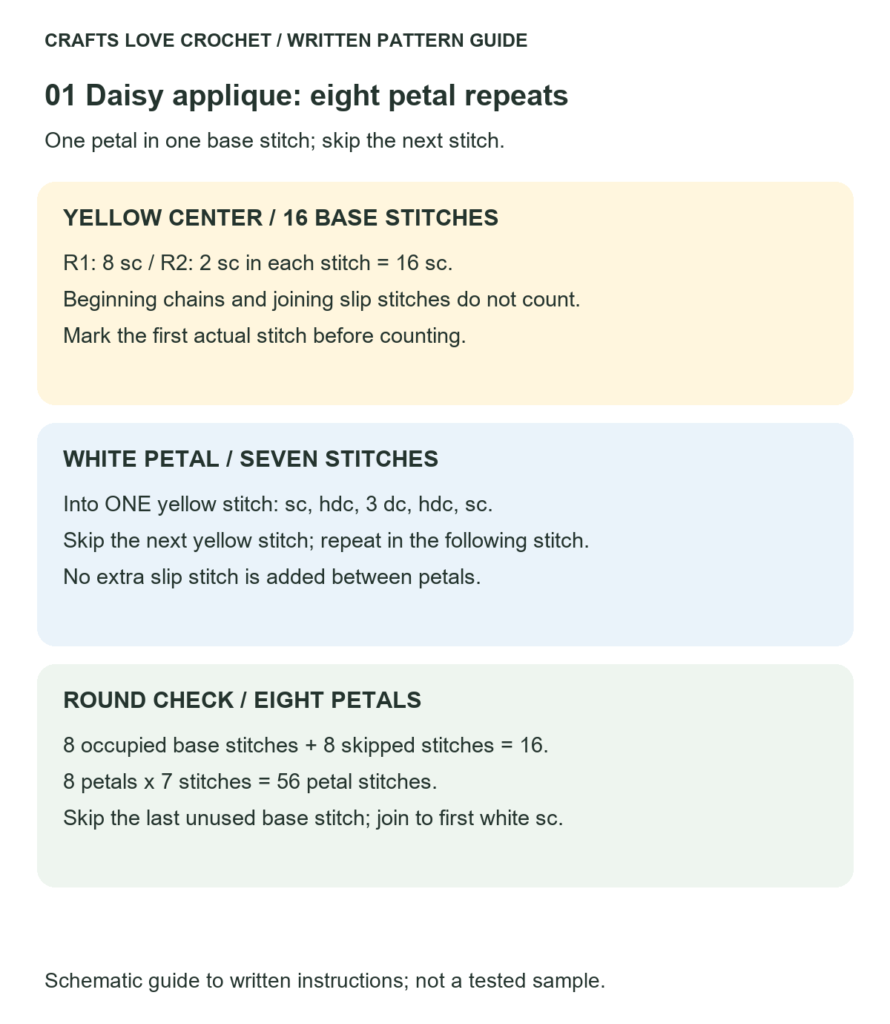
Open this guide at a larger size.
Two Leaves Worked Around a Chain
Make two with light green yarn.
Ch 10. You will work into nine chains along the first side, then return along the unused side of the foundation chain.
First Side
Starting in the second chain from the hook:
- Sc in the next ch.
- Hdc in the next ch.
- Dc in each of the next 5 ch.
- Hdc in the next ch.
- Work 3 sc in the final ch.
The three-sc group turns the work around the far end of the chain.
Return Side
Rotate the piece and work along the unused side of the foundation chain. Begin in the chain immediately after the three-sc turning group:
- Hdc in the next ch.
- Dc in each of the next 5 ch.
- Hdc in the next ch.
- Sc in the final ch.
Join with a sl st to the first sc. (19 sts)
Fasten off, leaving a sewing tail.
The joined end is the leaf base. The three-sc turning group forms the opposite end.
Make a second leaf in the same way. Compare the pair before sewing; a noticeably tighter foundation chain can make one leaf shorter or more curved than the other.
Visual Guide: Leaf Chain Route and Stem Options
The three-sc turn forms the far end of the leaf; the joined end is its base. Compare the two stem options before assembling the appliqué.
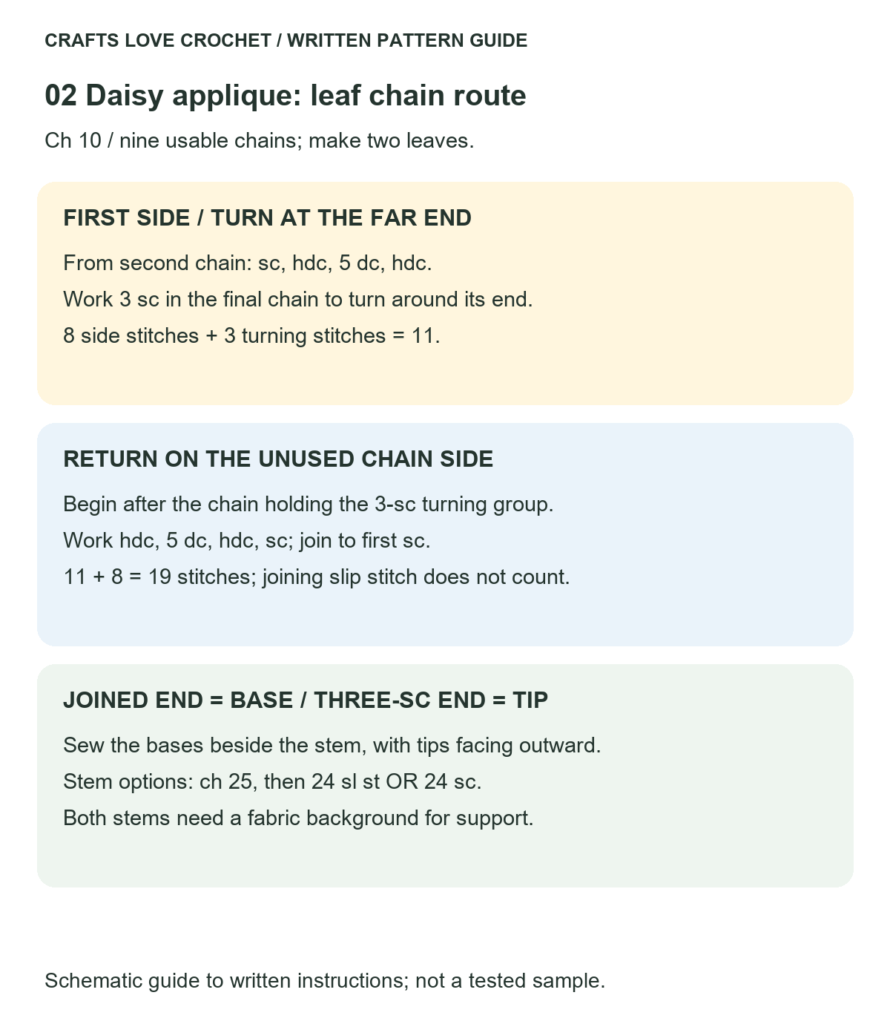
Open this guide at a larger size.
Pick One Stem
Both options begin with 25 chains and produce 24 stitches. Make only one stem for each daisy.
Narrow Slip-Stitch Stem
With light green, ch 25.
Working into the back bumps of the chain, sl st in the second ch from the hook and in each remaining ch. (24 sl sts)
Fasten off, leaving a sewing tail.
Keep the slip stitches relaxed enough to work comfortably. Pulling each one tightly can shorten and curl the strip.
Wider Single-Crochet Stem
With light green, ch 25.
Sc in the second ch from the hook and in each remaining ch. (24 sc)
Fasten off, leaving a sewing tail.
This option provides a wider strip for sewing. Neither version is a self-supporting flower stem; both are intended to lie against a background.
Assemble the Daisy
Lay the flower, stem, and leaves on a flat surface before joining them.
Attach the Stem to the Flower
Place one end of the stem behind the yellow center. Overlap enough of the stem to allow several small sewing stitches.
Using green yarn, sew the stem to the back of the center. Catch the backs of the yellow stitches where possible so the green sewing yarn does not show on the front.
Keep the white petals free.
Add the Leaves
Place one leaf on each side of the stem, approximately halfway down. You can align their bases or stagger them slightly.
Point the leaves outward and upward. Sew each leaf base securely to the stem.
Check the placement from the front before fastening off. The leaves should remain visible without covering the yellow center or bunching beneath the petals.
Sew the Appliqué onto Fabric
Position the assembled daisy on the receiving item and secure it temporarily with suitable pins or removable basting stitches.
Sew the stem down at intervals along its length. Attach the yellow center and the leaves with small stitches that catch the background fabric.
For an item that will be handled or washed frequently, add discreet stitches near the outer parts of the leaves and petals so they are less likely to catch. For a decorative panel, you may prefer to leave some edges free.
Do not pull the sewing yarn so tightly that the background puckers.
Troubleshooting the Small Details
There Are Only Seven Petals
Check the yellow center first: it should have sixteen stitches.
Then check the repeat. Each petal uses one base stitch, followed by one skipped stitch. Accidentally skipping two stitches leaves too little room for eight evenly spaced petals.
The Leaf Count Is Wrong
The first side has eight stitches before the three-sc turning group. The return side has another eight:
8 + 3 + 8 = 19 stitches.
Do not work into the turning chain, and do not add another stitch into the far-end chain after completing its three-sc group.
The Stem Twists
A tight foundation chain or very tight slip stitches can encourage twisting. Check that the chain lies comfortably before working into it.
Minor curves can be positioned while sewing the stem down. If it twists strongly, remake it with a more relaxed chain or try the single-crochet option.
The Petals Look Uneven
Check that every petal contains one sc, one hdc, three dc, one hdc, and one sc. A missing double crochet changes the height of a petal.
If the counts match, compare tension before trying to stretch the petals into shape.
Finishing and Color Variations
Weave in all remaining ends through several stitches, changing direction before trimming.
If the yarn permits damp blocking, shape the flower and leaves gently and let them dry completely before attaching them to fabric. Blocking can smooth minor irregularities, but it will not correct missing stitches.
White petals and a yellow center give this daisy flower crochet applique pattern its familiar palette. You can also use cream petals for a softer contrast, or repeat the same flower in several colors across a fabric panel.
For a separate floral accessory, explore the crochet sunflower keychain pattern. It uses a different petal construction and includes a hardware attachment.
Frequently Asked Questions
Can I make just the daisy head?
Yes. Complete the yellow center and white petals, then omit the stem and leaves. Sew the flower directly to the item you want to decorate.
Can beginners follow this daisy flower crochet applique pattern?
Yes, if they are comfortable with single, half double, and double crochet. The leaf is the section that needs the closest attention because it is worked along both sides of the foundation chain.
How can I make a smaller daisy?
Use finer yarn and an appropriately smaller hook while keeping the stitch counts unchanged. Make one flower head first to check the size before completing the remaining pieces.
Does the appliqué need glue?
No. The components and the finished motif can all be sewn in place. Sewing also lets you choose which edges remain slightly raised.
Can I wash the decorated item?
Follow care instructions that suit both the appliqué yarn and the background fabric. Check the attachment stitches before washing, reshape while damp if needed, and allow the item to dry thoroughly.
Make the Placement Your Own
A single daisy near the corner of a pouch gives the flower room to stand out. Several along a hem or across a cushion create a different effect, especially when the stems lean in slightly different directions.
Before sewing permanently, take a photo of the arrangement. It can make uneven spacing easier to notice.
If you use this daisy on a project, share where you placed it and which stem option you chose. Those practical details can give the next crocheter a useful starting point.