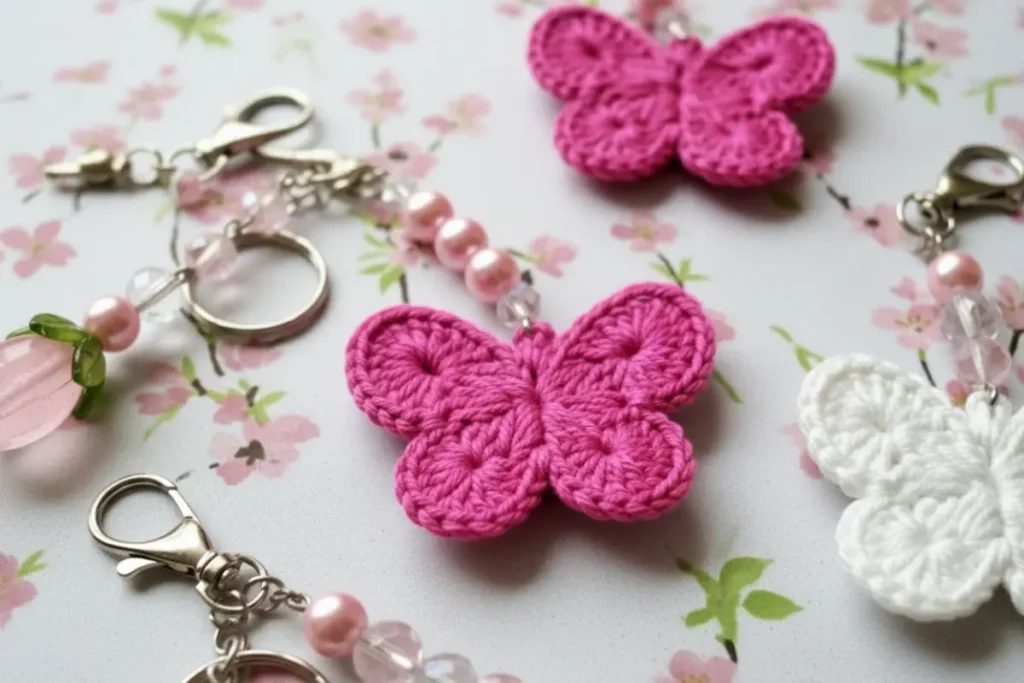
Choosing the colors is part of the fun with this crochet butterfly keychain pattern. A pale center and darker border emphasize the wings, while a contrasting body brings the four separate pieces together.
The butterfly has two smaller upper wings and two larger lower wings. Each wing begins with a circular center, followed by a border that moves from short stitches near the body to taller stitches along the outer edge.
The assembly includes a front and back body strip, two small antennae, and a separate attachment loop. These finishing details give you defined places to join the wings and attach the keyring hardware.

Pick Your Three Colors
You will need sport- or DK-weight cotton yarn in three colors:
- Color A: wing borders.
- Color B: wing centers.
- Color C: body, antennae, and attachment loop.
Use the same yarn weight throughout. Different thicknesses can change the proportions even when the stitch counts match.
You will also need:
- A 2.5–3.5 mm crochet hook suited to your yarn.
- Yarn needle.
- Scissors.
- Stitch markers.
- A split keyring.
- An optional keyring chain with a suitable connector.
Choose a hook that gives you defined stitches without making the fabric difficult to work. Finished size depends on your materials and tension; check the completed wings against the keyring before assembly.
Skill level: Confident beginner to intermediate. You should be comfortable working into a magic ring, changing colors, making treble crochet stitches, and sewing small pieces together.
Stitch Guide
This pattern uses US terminology.
| Abbreviation | Meaning |
|---|---|
| ch | chain |
| sl st | slip stitch |
| sc | single crochet |
| hdc | half double crochet |
| dc | double crochet |
| tr | treble crochet |
| st / sts | stitch / stitches |
| MR | magic ring |
For a US treble crochet, yarn over twice, insert the hook into the indicated stitch, yarn over and pull up a loop. Yarn over and pull through two loops three times.
The Craft Yarn Council’s crochet abbreviation guide provides a reference for these terms and their UK equivalents.
Important: The beginning ch 3 counts as one dc in the wing centers. The ch 1 used for the borders does not count as a stitch. Joining slip stitches are excluded from all totals.
Crochet Butterfly Keychain Pattern: Four Separate Wings
Make both wings of each pair with the same hook and tension. Compare the matching pieces before sewing them together.
Smaller Upper Wings — Make Two
Round 1, Color B: Make a magic ring. Ch 3, then work 11 dc into the ring. Pull the ring closed and join with a sl st to the top of the beginning ch 3. (12 sts)
Fasten off Color B.
Round 2, Color A: Attach yarn with a sl st in any stitch of Round 1. Ch 1.
Beginning in the same stitch where you attached the yarn, work:
- 2 sc in the first st.
- 2 hdc in the next st.
- 2 dc in each of the next 2 sts.
- 2 tr in each of the next 4 sts.
- 2 dc in each of the next 2 sts.
- 2 hdc in the next st.
- 2 sc in the final st.
Join with a sl st to the first sc. (24 sts)
Fasten off, leaving a long sewing tail.
This round uses all twelve base stitches once, placing two stitches into each. The short-stitch section around the join is the inner edge that will sit beside the body.
Mark that inner edge.
Larger Lower Wings — Make Two
Round 1, Color B: Make a magic ring. Ch 3, then work 15 dc into the ring. Pull the ring closed and join with a sl st to the top of the beginning ch 3. (16 sts)
Fasten off Color B.
Round 2, Color A: Attach yarn with a sl st in any stitch of Round 1. Ch 1.
Beginning in the same stitch where you attached the yarn, work:
- 2 sc in each of the first 2 sts.
- 2 hdc in each of the next 2 sts.
- 2 dc in each of the next 2 sts.
- 2 tr in each of the next 4 sts.
- 2 dc in each of the next 2 sts.
- 2 hdc in each of the next 2 sts.
- 2 sc in each of the final 2 sts.
Join with a sl st to the first sc. (32 sts)
Fasten off, leaving a long sewing tail. Mark the short-stitch section around the join as the inner edge.
Check the Wing Pairs
| Wing pair | Center count | Border count |
|---|---|---|
| Smaller upper wings | 12 | 24 |
| Larger lower wings | 16 | 32 |
Lay the wings on a flat surface. Matching wings should be similar in size and shape.
If one looks different, check that you counted the beginning ch 3 as a stitch in Round 1 and worked into its top during Round 2. Missing that stitch leaves the border incomplete.
Visual Guide: Small and Large Wing Borders
Check the shorter stitches near each joining edge and the taller stitches around the outer wing curve. The starting chain counts in the wing center, but not in its border.

Open this guide at a larger size.
Body, Antennae, and Attachment Loop
Body Strips — Make Two
With Color C, ch 9.
Starting in the second ch from the hook, sc in each chain across. (8 sc)
Fasten off, leaving a long sewing tail.
One strip covers the front wing joins; the other covers the back.
Antennae — Make Two
Work directly from the ball of Color C, leaving a starting tail for sewing.
Ch 6. Starting in the second ch from the hook, sl st in each chain back toward the starting end. (5 sl sts)
Fasten off, leaving another sewing tail.
The foundation end is the antenna base. The turning end forms its tip. Do not pull the slip stitches excessively tight, or the antenna may become difficult to shape.
Attachment Loop — Make One
With Color C, leave a sewing tail and ch 8.
Starting in the second ch from the hook, sl st in each chain across. (7 sl sts)
Fasten off with a second sewing tail.
Fold the strip into a loop with its two short ends together. These ends will be sewn into the upper body assembly.
Assemble the Butterfly from the Center Out
Before sewing, place all four wings with their right sides facing upward.
Arrange the smaller wings at the top and the larger wings below them. Point the marked inner edges toward the center. Rotate the wings until the left and right sides look balanced.
Join the Wings
Overlap the inner edge of each upper wing slightly with the lower wing on the same side. Sew those overlapping sections together using the wing tails.
Bring the left and right pairs together at the center and join their inner edges. Keep these seams within the area the body strips will cover.
Avoid drawing the sewing yarn so tightly that the wings fold inward.
Position the Body and Antennae
Place one body strip vertically over the central seams, with its top between the smaller wings.
Sew the two antenna bases to the back of this strip near its top, one on each side. Let their tips angle outward.
Position the folded attachment loop behind the top of the body, between the antennae. Its folded end should extend above the body; both short ends should overlap the body fabric.
Sew the Attachment Loop Securely
Sew both loop ends to the body strip with several passes through different stitches. Catch the central wing join as well, so the attachment is not supported by a single stitch.
Place the second body strip behind the butterfly, aligned with the front strip.
Sew the body strips together along their edges, catching the wing joins between them. At the top, stitch through both body layers and the attachment-loop ends again.
Leave the antennae and the projecting part of the loop free.
Weave in all tails through several stitches, changing direction before trimming.
Visual Guide: Body Sandwich and Keyring Loop
Sandwich the wing bases between the two body strips. Fold the attachment loop and sew both ends securely into the upper body join; keep it separate from the antennae.
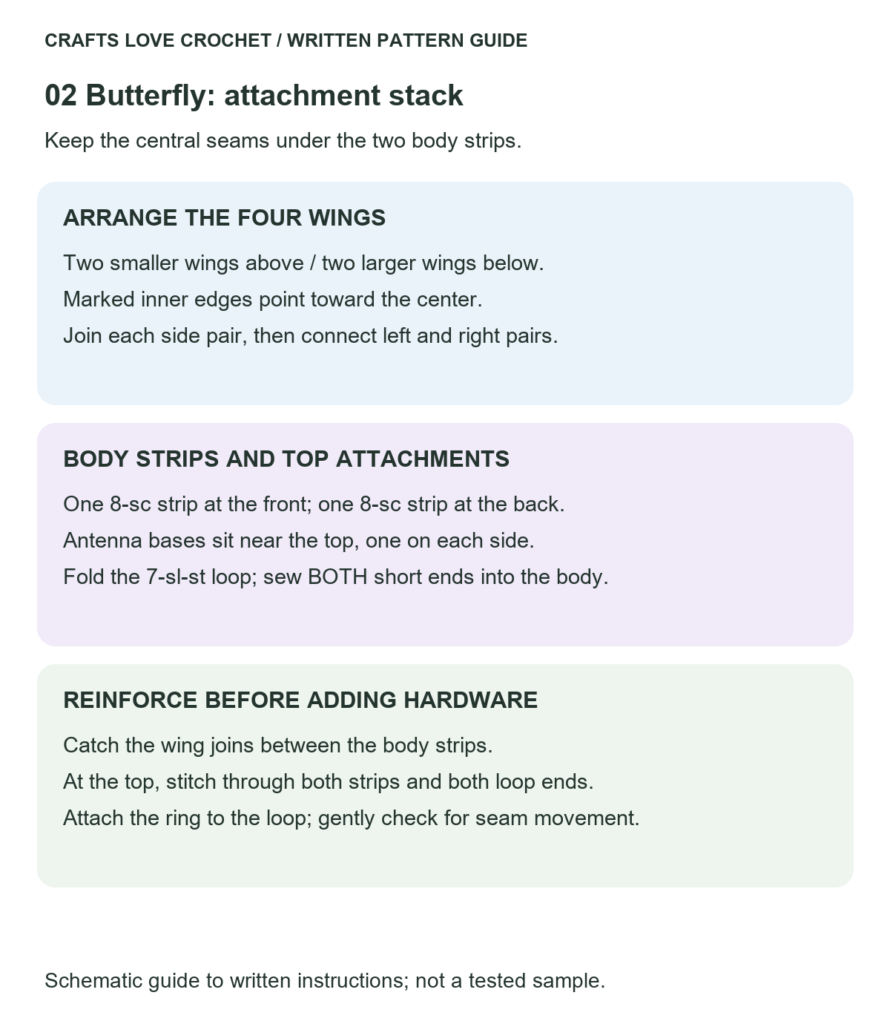
Open this guide at a larger size.
Add the Keyring
Thread a split keyring through the crocheted loop. If you are using a chain, connect its end to the loop with hardware designed for that purpose and ensure the connector is fully closed.
Do not attach the hardware to an antenna or a single outer wing stitch.
Hold the body and gently pull the ring to check for slipping, opening seams, or stitches that stretch excessively. Reinforce any loose attachment before using the charm.
Finishing Without Flattening the Detail
Shape the wings with your fingers first. If your yarn permits damp blocking, shape the butterfly on a towel and allow it to dry completely.
Do not stretch the outer borders aggressively. The taller stitches provide the wing shape, and pulling them can distort the proportions.
For the crochet butterfly keychain pattern, check the center after finishing as well as the wings. The body should sit over the joins without twisting, and the attachment loop should emerge from the top center.
Small Details Worth Checking
Color-change joins: Secure the starting ends of the border yarn. A loose join can become more visible when the wing is handled.
Matching tension: Compare the two upper wings with each other and the two lower wings with each other. Comparing an upper wing with a lower wing will not help, because their counts differ intentionally.
Center thickness: Spread woven ends through nearby stitches instead of stacking every tail beneath the body.
Antenna placement: Keep the antennae outside the keyring loop so the hardware does not repeatedly rub across them.
Wear at the loop: Check the yarn occasionally where it touches the metal. Replace a worn loop before it breaks.
Color Ideas and Other Uses
For a soft palette, pair lavender centers with cream borders and a plum body. For stronger contrast, try yellow centers, blue borders, and a dark body.
You can also omit the attachment loop and keyring and use the butterfly as an appliqué. Sew the body and selected points along the wings to the receiving fabric so the motif does not hang from its center alone.
A butterfly and a flower can make a coordinated pair of decorations. The daisy flower crochet appliqué pattern offers a floral companion for a pouch, tote, or fabric display.
Frequently Asked Questions
Is this crochet butterfly keychain pattern suitable for beginners?
It is suitable for crocheters who already know basic stitches and are ready to practice treble crochet and assembly. Making one small wing first lets you check the stitch sequence before committing to all four.
Why are the lower wings larger?
This version uses a stylized arrangement with twelve-stitch centers for the upper wings and sixteen-stitch centers for the lower wings. Place the pieces on a flat surface before sewing to see how those proportions work together.
Can I use thicker yarn?
Yes, but the butterfly will become larger and may need different hardware. Keep the same yarn weight across the wings and body, and check whether the finished size suits your intended use.
Does it need stuffing or stiffener?
No stuffing is used. Stiffener is not required by the instructions; the wings remain flexible. If you want to use a finishing product for a display piece, test it on a separate yarn sample first.
How should I clean the keychain?
Follow the yarn’s care instructions and remove the hardware if possible. Spot cleaning may be sufficient. Reshape the wings and let the crochet dry completely before reattaching the metal parts.
Make a Coordinated Pair
If you enjoy small accessories with separate decorative pieces, the crochet sunflower keychain pattern is another project to explore. You could repeat one butterfly color in the sunflower to tie the two charms together.
Before making several butterflies, finish one complete piece, including the hardware. Note your yarn, hook size, and any assembly adjustments so the next one is easier to match.
Which two colors would you choose for the wings? Share your combination in the comments, especially if you found a pairing that makes the border stand out.