This crochet star snowflake wreath ornament pattern combines an open cream center, two layers of petals, and miniature stars. White embroidery adds branching details to the blue outer petals, while a yellow bow and optional star pendants complete the decoration.
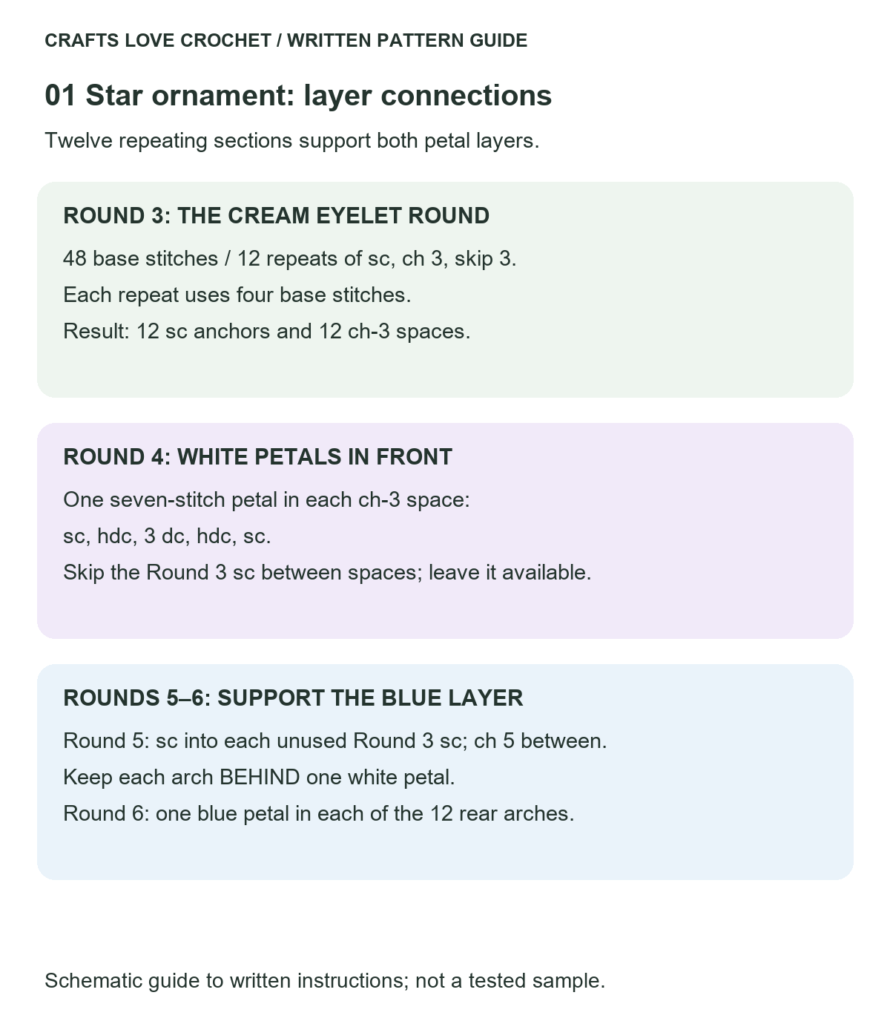
The construction is divided into sections so you can check each layer before adding the next. The white petals sit in front; a separate round of chain arches behind them supports the blue layer.
The design uses 12 repeating sections. Keeping track of those sections is more useful than judging the shape by appearance alone, particularly while working behind the first layer.
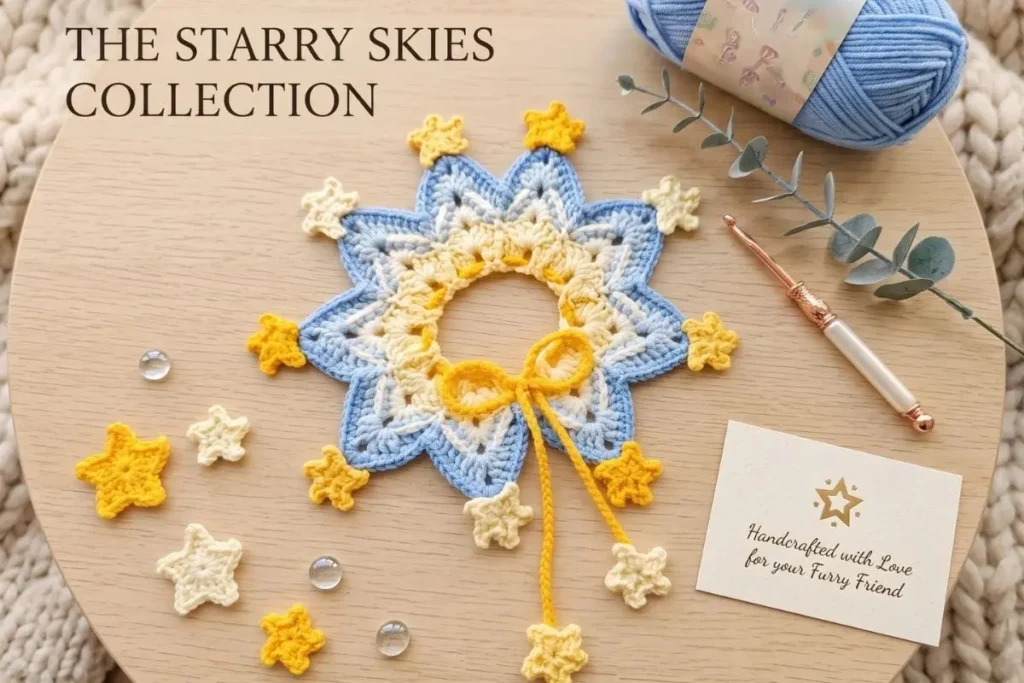
Materials for the Crochet Star Snowflake Wreath Ornament Pattern
- Sport-weight cotton yarn in cream, white, baby blue, and golden yellow.
- A 2.5 mm crochet hook as a starting point.
- A tapestry needle.
- Scissors.
- Stitch markers.
- A measuring tape.
- A suitable blocking surface and rust-resistant pins, if blocking.
Use yarns of similar thickness for the main layers.
Finished measurements depend on your yarn, hook, and tension. Measure the completed piece after finishing rather than relying on a fixed diameter.
Abbreviations and Techniques
This pattern uses US crochet terminology.
- ch: chain.
- sl st: slip stitch.
- sc: single crochet.
- hdc: half double crochet.
- dc: double crochet.
- tr: treble crochet.
- st / sts: stitch / stitches.
- sp: space.
- MR: magic ring.
- FO: fasten off.
A US treble crochet begins with two yarn overs.
For standard stitch abbreviations and a comparison of US and UK terms, refer to the Craft Yarn Council’s crochet abbreviation guide.
Crochet Star Snowflake Wreath Ornament Pattern: Construction Notes
Work the main ornament in joined rounds without turning.
Beginning chains do not count as stitches. Join to the first actual stitch of the round unless instructed otherwise.
The central opening is formed with a joined foundation chain. The magic ring is used only for the miniature stars.
The main sections are:
- A cream ring and eyelet round.
- Twelve white inner petals.
- Twelve supporting arches behind those petals.
- Twelve blue outer petals and their outline.
- White embroidery.
- Twelve border stars.
- A bow, hanging loop, and two optional star pendants.
Check the count at the end of each section before continuing.
Part 1: Cream Center Ring
Foundation
With cream, ch 24.
Check that the chain is not twisted. Join with a sl st to the first chain to form a ring.
Do not pull this opening closed.
Round 1 — 24 Single Crochet
Ch 1.
Work 1 sc into each foundation chain around, beginning in the chain used for the join.
Join with a sl st to the first sc.
Count: 24 sc.
Round 2 — 48 Double Crochet
Ch 2.
Work 2 dc into each stitch around, beginning in the stitch at the base of the chain.
Join with a sl st to the first dc.
Count: 48 dc.
Round 3 — 12 Eyelets
Ch 1.
Beginning in the stitch at the base of the chain, repeat the following sequence 12 times:
- Work 1 sc into the next available stitch.
- Ch 3.
- Skip the next three stitches.
After the final repeat, join with a sl st to the first sc.
Count: 12 sc and 12 ch-3 spaces.
Each repeat uses four stitches from Round 2.
Fasten off cream.
Place the ring on a level surface and inspect it before adding the petals. If it folds or waves strongly, check the counts and assess the construction with your chosen yarn and hook before continuing.
Part 2: White Inner Petals
Round 4 — 12 Petals
Join white with a sl st into any ch-3 space.
Ch 1, then work the following into that same space:
1 sc, 1 hdc, 3 dc, 1 hdc, 1 sc.
Skip the next sc from Round 3.
Work the same seven-stitch group into the next ch-3 space.
Continue around, making one petal in each space and skipping the single crochet between spaces.
After the final petal, join with a sl st to the first sc of the first petal.
Count: 12 petals, with seven stitches in each petal.
Fasten off white.
The 12 sc stitches from Round 3 have not been worked into during this petal round. They will anchor the supporting arches.
Part 3: Supporting Arches Behind the Petals
Round 5 — 12 Arches
Keep the front of the ornament facing you and gently lift the white petals to access the sc stitches of Round 3.
Join white through both top loops of any Round 3 sc.
Ch 1 and work 1 sc into that same stitch.
Ch 5, keeping the chain behind the next white petal.
Work 1 sc into the next Round 3 sc.
Continue around, working a ch-5 arch behind each white petal and an sc into each following Round 3 sc.
After making the twelfth arch, join with a sl st to the first sc of this round.
Count: 12 sc anchors and 12 ch-5 arches.
Fasten off white.
Lift the inner petals and count the arches. Each arch should sit behind one white petal rather than crossing its front.
Visual Guide: Petal Layer Connections
Follow the three stages in order. White petals use the ch-3 spaces, while their rear support arches attach to the unused Round 3 sc stitches.
Open this guide at a larger size.
Part 4: Blue Outer Petals
Round 6 — 12 Blue Petals
Join baby blue with a sl st into any ch-5 arch.
Ch 1.
Work the following eight stitches into that arch:
1 sc, 1 hdc, 1 dc, 2 tr, 1 dc, 1 hdc, 1 sc.
Work a sl st into the next sc anchor from Round 5.
Repeat around, working one eight-stitch petal into each arch and one separating sl st into the following anchor.
After completing the final separating sl st, join to the first sc of the first blue petal.
Count: 12 petals, containing 96 petal stitches in total, plus 12 separating slip stitches.
Do not fasten off.
Keep the white petals in front of the blue layer.
Round 7 — Blue Petal Outline
Ch 1.
Work across the eight stitches of the first blue petal as follows:
- Work 1 sc into stitch 1.
- Work 1 hdc into stitch 2.
- Work 1 dc into stitch 3.
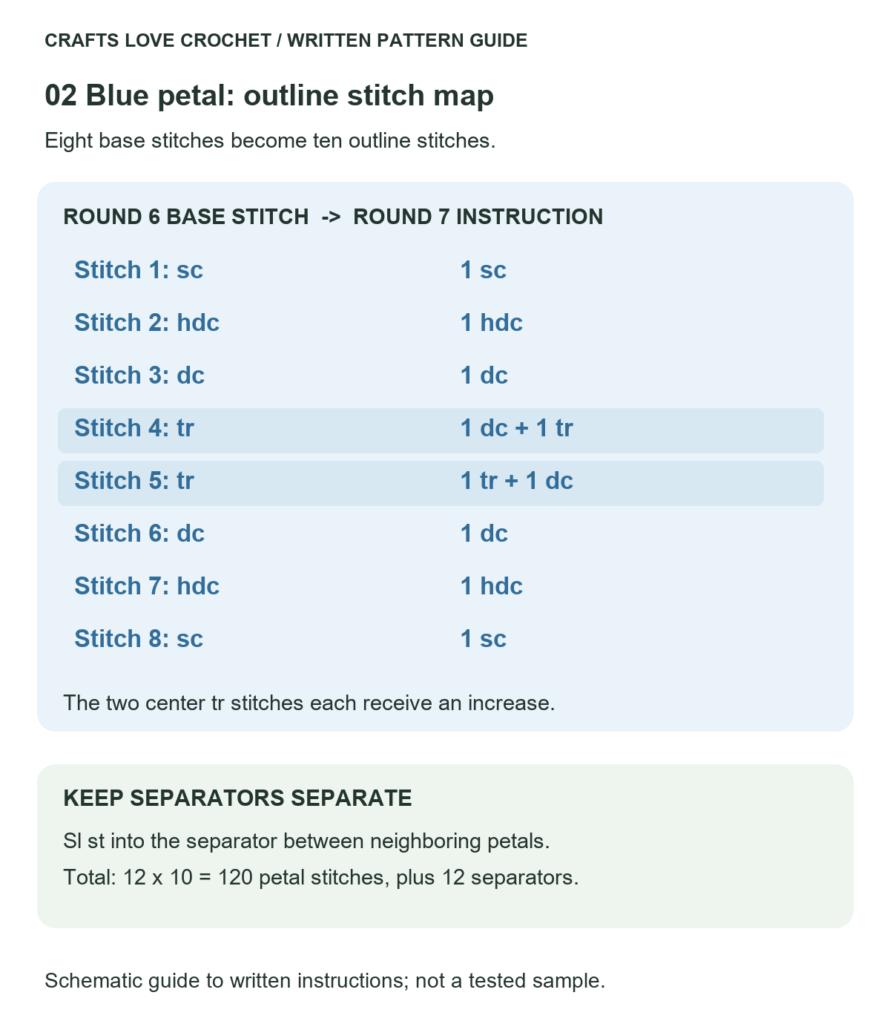
- Work 1 dc and 1 tr into stitch 4.
- Work 1 tr and 1 dc into stitch 5.
- Work 1 dc into stitch 6.
- Work 1 hdc into stitch 7.
- Work 1 sc into stitch 8.
Work a sl st into the separating slip stitch between this petal and the next.
Repeat the same sequence across all 12 petals.
After the final separator, join with a sl st to the first sc of the round.
Count: 10 outline stitches per petal, or 120 petal stitches in total, plus 12 separating slip stitches.
Fasten off blue.
The two increases in each repeat are worked over the two treble crochet stitches at the center of the previous petal.
Visual Guide: Blue Petal Outline
Read each row as one base stitch and the stitches worked into it in Round 7. Both center tr stitches receive two stitches; keep the separating slip stitches outside the petal count.
Open this guide at a larger size.
Part 5: White Embroidered Details
Use white yarn and a tapestry needle.
On each blue petal, identify the lower center and the midpoint between the two tallest outline stitches.
Embroider a line from the lower center toward that midpoint. Use shorter consecutive stitches if one long stitch would sit loosely above the fabric.
Add two shorter diagonal branches, one on each side of the upper portion of the line.
Keep the embroidery on the blue petal rather than stitching through the white petal beneath it.
Lay the ornament flat as you work. The embroidery should rest on the surface without drawing the petal inward.
Repeat on all 12 blue petals and secure the ends on the reverse.
Part 6: Miniature Stars
For the border, make:
- Six golden yellow stars.
- Six cream stars.
For the optional pendants, make two additional stars in your preferred colors.
Total: 12 stars without pendants, or 14 with pendants.
Make One Star
Make an MR, leaving it open while you work.
Repeat the following sequence five times:
- Work 1 sc into the ring.
- Ch 3.
- Sl st into the second chain from the hook.
- Work 1 sc into the remaining chain.
- Sl st into the ring.
Each repeat forms one small point.
After the fifth repeat, tighten the ring and join with a sl st to the first sc worked into the ring.
Fasten off, leaving a sewing tail.
Arrange the five points gently and secure the ring tail so the center does not reopen.
Make one complete star and compare its size with a valley between the blue petals before making the remaining stars.
Part 7: Attach the Border Stars
The outer layer has 12 valleys, one between each neighboring pair of blue petals.
Place one star over each valley, alternating yellow and cream.
Arrange all 12 stars before sewing. With an even number of positions, the alternating colors should continue evenly around the circle.
Use each star’s tail to secure it with several small stitches through its center and nearby fabric. Avoid pulling neighboring petals tightly together.
Keep the outer points free where possible so the star shape remains visible.
Part 8: Bow and Optional Star Pendants
Yellow Bow Cord
With yellow, ch 60.
Fasten off and secure the ends.
Choose a lower section of the cream eyelet ring. Thread the cord through two neighboring eyelets and tie it into a bow.
Adjust the bow so it sits without tightening or distorting the central ring. Secure its center to the ornament with a small sewing stitch.
The chain count is a starting length; adjust it if your yarn produces a cord that is too short or too long for the bow.
Optional Pendants
Make two separate chains of 18 stitches, leaving sewing tails at both ends.
Attach one additional star to the lower end of each chain.
Sew the upper ends beneath the bow, attaching them to the ornament itself rather than relying only on the bow knot.
Check that both stars hang freely.
Part 9: Add a Separate Hanging Loop
At the top of the ornament, choose a cream stitch from Round 2, opposite the bow.
Join cream yarn through both top loops of that stitch.
Ch 30, then sl st back into the same attachment stitch to form a loop.
Fasten off, leaving a tail. Use that tail to secure the base of the loop to adjacent cream stitches before weaving it in.
Lift the ornament gently by the loop and check its orientation before completing the finishing.
Finishing the Crochet Star Snowflake Wreath Ornament Pattern
Weave in all remaining ends.
If wet blocking, follow the yarn label’s care instructions. Arrange the ornament on a suitable surface, spacing the petals evenly around the center.
Position the white layer in front of the blue layer. Shape the small stars gently without pulling the sewing stitches.
Allow everything to dry completely before hanging.
Do not use forceful stretching to conceal a counting or construction problem. If a layer remains strongly folded or crowded, identify where the distortion starts before adding stiffener or further embellishments.
Practical Tips
Count the Eyelets Before Making Petals
Round 3 must contain 12 ch-3 spaces. The white petals and rear arches both depend on this count.
Keep the Rear Chains Behind the White Layer
Lift each white petal as you make its supporting arch. A chain that crosses the front can restrict the petal and remain visible after assembly.
Separate Petal Stitches from Joining Stitches
Each initial blue petal contains eight stitches. The slip stitch between petals is a separator and is not one of those eight.
Check the Two Outline Increases
The fourth and fifth stitches of each blue petal receive two stitches each in the outline round. The remaining six stitches receive one each, giving ten stitches per outlined petal.
Embroider Without Gathering the Fabric
After adding each embroidered line, place the ornament flat. Loosen or redo the embroidery if the petal begins to fold toward the center.
Frequently Asked Questions
Is This Crochet Star Snowflake Wreath Ornament Pattern Suitable for Beginners?
The project combines joined rounds, several stitch heights, work behind an existing layer, embroidery, and sewing. It is easier to approach after practicing those techniques individually.
Why Does the Center Begin with a Chain Ring?
The joined chain establishes an open center. A magic ring is adjustable and can close completely, so it is reserved here for the small stars.
How Many Stars Do I Need?
Make 12 for the border: six yellow and six cream. Make two more if you want the hanging star pendants.
Why Does Each Blue Petal Have Ten Stitches in the Outline?
The initial petal has eight stitches. Two central stitches each receive an increase, adding two stitches and producing a ten-stitch outline.
Can I Change the Colors?
Yes. Keep the yarn thickness similar across the main sections, and choose an embroidery color that remains visible against the outer petals.
More Layered Crochet Projects
For another design built around a circular center and decorative edging, explore our Lavender Bell Flower Doily.
If you prefer a smaller accessory, our Crochet Sunflower Keychain Pattern also separates the center, petals, and finishing into individual stages.
Share Your Winter Color Palette
If you try this crochet star snowflake wreath ornament pattern, share your yarn, hook size, finished measurements, and any adjustments you made.
A close-up of the two petal layers is especially useful for showing how the rear arches support the outer section.