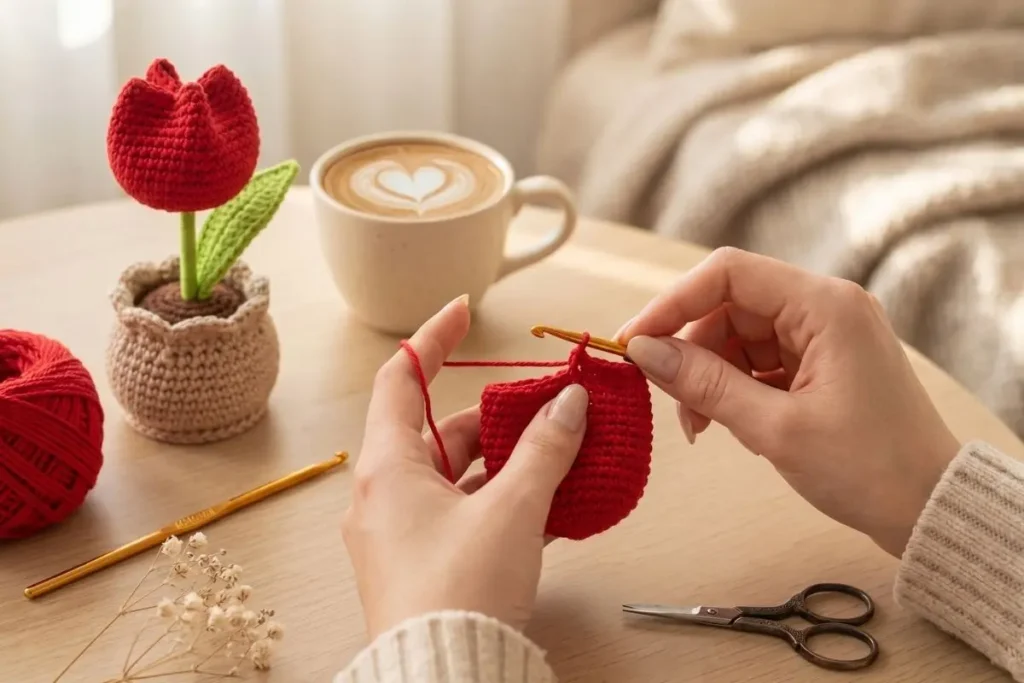
There is something timeless about crocheted flowers. They bring color, charm, and warmth into any space, and unlike fresh flowers, they stay beautiful all year long. This Tulip Flower in Pot Amigurumi Crochet Pattern is one of those projects that instantly brightens a desk, bookshelf, craft room, or gift basket.
The tulip is assembled from a crocheted bloom, a stem cover, a leaf, and a pot with two internal support discs. Read the support and assembly sections before cutting wire: the lower anchor, upper disc, and flower-to-stem seam each serve a different purpose.
The project combines simple amigurumi techniques with elegant shaping details that give the tulip its distinctive appearance. While it’s designed for intermediate crocheters, confident beginners who are familiar with basic stitches can absolutely enjoy making it as well.
Materials and Project Notes
You will need:
- Cotton yarn in red, green, and beige or light brown.
- A 2.0–2.5 mm hook, provided it suits your chosen yarn thickness.
- Polyester fiberfill.
- Floral wire, approximately 18–20 gauge, with stiffness appropriate for the flower’s weight.
- Floral tape.
- Yarn needle.
- Stitch marker.
- Scissors.
- Wire cutters and pliers.
Use yarns of similar thickness throughout. Select a hook that produces close stitches without making them difficult to work.
Skill level: Intermediate. The project combines continuous-round crochet, shaped closure, and a supported stem assembly.
Finished size: Determined by yarn, hook, tension, and assembly. Measure the completed sample rather than relying on a fixed height.
This wired version is intended as a display decoration, not a toy. Cover all wire ends and keep them enclosed within the finished construction.
Abbreviations
US crochet terminology is used throughout.
| Abbreviation | Meaning |
|---|---|
| MR | magic ring |
| ch | chain |
| sl st | slip stitch |
| sc | single crochet |
| hdc | half double crochet |
| inc | 2 sc in the same stitch |
| dec | single crochet decrease |
| BLO | back loop only |
| st / sts | stitch / stitches |
For the stuffed flower, an invisible decrease can be made by inserting the hook under the front loops of the next two stitches, drawing yarn through both front loops, then completing the single crochet.
The Craft Yarn Council’s crochet abbreviation guide provides a reference for standard stitch terms.
Work in continuous rounds unless instructed otherwise. Mark the first stitch of each round and move the marker as you progress.
Tulip Flower in Pot Amigurumi Crochet Pattern: The Bloom
With red yarn:
| Round | Instructions | Count |
|---|---|---|
| 1 | 6 sc in MR | 6 |
| 2 | Inc in each st | 12 |
| 3 | (Sc, inc) 6 times | 18 |
| 4 | (Sc in next 2 sts, inc) 6 times | 24 |
| 5–9 | Sc in each st | 24 |
| 10 | (Sc in next 2 sts, dec) 6 times | 18 |
Add a small amount of stuffing.
Round 11: (Sc, dec) 6 times. (12 sts)
Round 12: Sc in each st. (12 sts)
Fasten off with a long sewing tail.
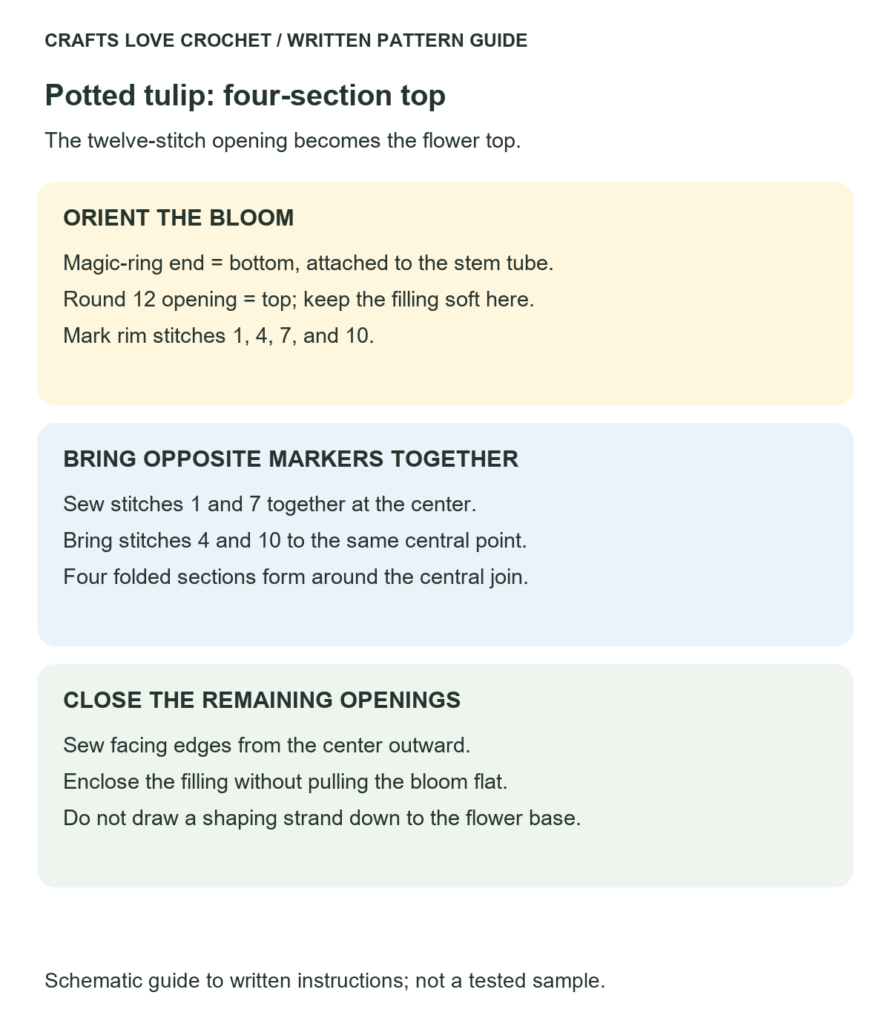
The magic-ring end is the bottom of the flower. The twelve-stitch opening will become the shaped top.
Close the Top into Four Sections
Add any remaining stuffing before closing. Leave the area immediately beneath the opening soft enough to pinch together.
Starting at the first stitch of Round 12, mark stitches 1, 4, 7, and 10.
- Bring stitches 1 and 7 together at the center and sew them together.
- Bring stitches 4 and 10 to that same central point and secure them there.
- The rim now forms four small folded sections around the joined center.
- Sew the facing edges of each remaining opening together, working from the central join outward until the stuffing is enclosed.
Use small stitches and adjust the folds gradually. Avoid pulling a shaping strand all the way through the flower to its base, which can flatten the bloom.
Secure the yarn and hide the tail inside the flower.
Visual Guide: Four-Section Tulip Closure
Keep the magic-ring base at the stem end. Divide the twelve top stitches into four sections before sewing the opening closed.
Open this guide at a larger size.
Crochet the Pot
With beige yarn:
| Round | Instructions | Count |
|---|---|---|
| 1 | 6 sc in MR | 6 |
| 2 | Inc in each st | 12 |
| 3 | (Sc, inc) 6 times | 18 |
| 4 | (Sc in next 2 sts, inc) 6 times | 24 |
| 5 | Sc in BLO around | 24 |
| 6–10 | Sc in each st | 24 |
| 11 | (Sc in next 6 sts, inc) 3 times, sc in final 3 sts | 27 |
| 12 | Sc in each st | 27 |
| 13 | (Sc in next 8 sts, inc) 3 times | 30 |
| 14 | Sc in each st | 30 |
Raised Rim
Round 15: Work one reverse sc, also called crab stitch, into each of the thirty stitches around the rim.
Reverse sc is worked in the direction opposite your usual single crochet, without turning the piece.
Join neatly and fasten off. (30 reverse sc)
Keep this edging relaxed enough that it does not pull the opening inward.
Make the Two Support Discs
Lower Disc
With beige yarn:
- Round 1: 6 sc in MR. (6)
- Round 2: Inc in each st. (12)
- Round 3: (Sc, inc) 6 times. (18)
- Round 4: (Sc in next 2 sts, inc) 6 times. (24)
Fasten off with a sewing tail.
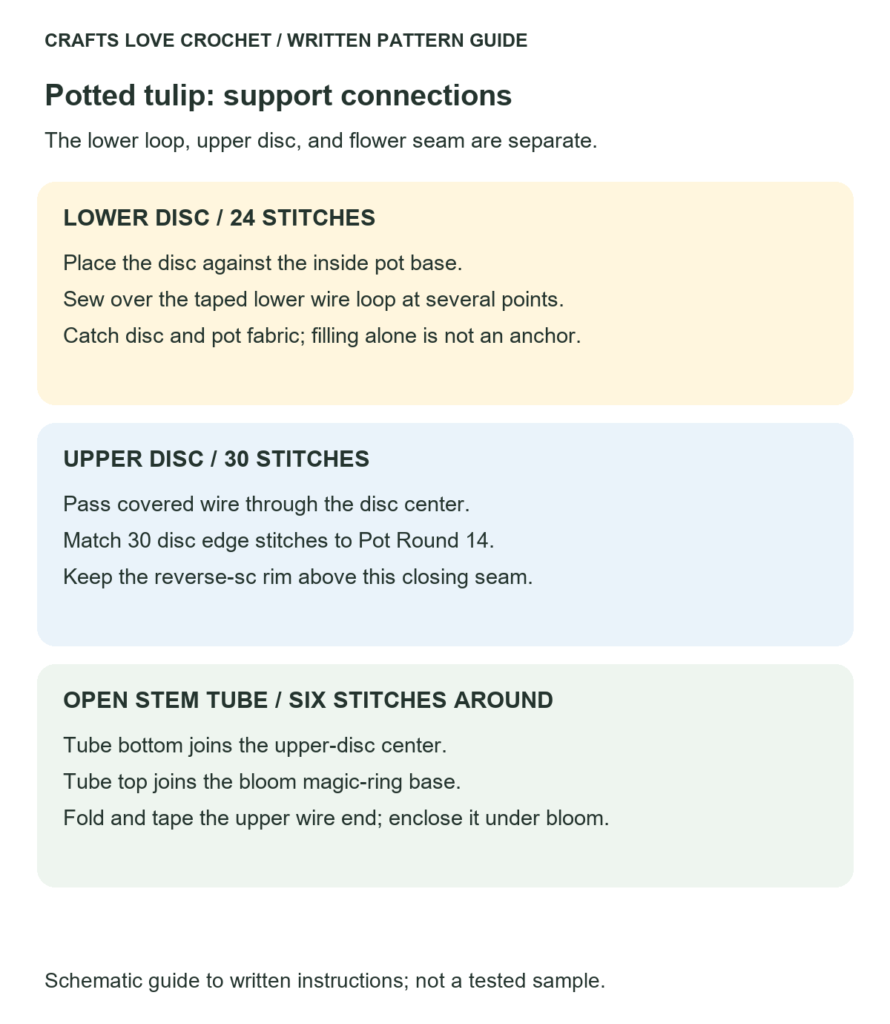
This disc sits inside the pot against its bottom. It provides crochet fabric to stitch over the lower wire loop.
Upper Disc
With beige or light brown yarn:
- Round 1: 6 sc in MR. (6)
- Round 2: Inc in each st. (12)
- Round 3: (Sc, inc) 6 times. (18)
- Round 4: (Sc in next 2 sts, inc) 6 times. (24)
- Round 5: (Sc in next 3 sts, inc) 6 times. (30)
Fasten off with a long sewing tail.
Leave the magic-ring opening just loose enough for the covered stem wire to pass through. It will be tightened and secured during assembly.
The thirty-stitch outer edge matches the thirty-stitch upper section of the pot.
Green Stem Cover
The stem cover is a tube with both ends open.
With green, ch 6. Join with a sl st to the first chain without twisting.
Round 1: Ch 1, sc in the same chain and in each of the remaining five chains. (6 sc)
Continue in a spiral, without joining subsequent rounds.
Rounds 2–18: Sc in each st. (6 sts per round)
Fasten off with a long sewing tail. Do not stuff or close either end.
The tube covers the visible section of the support above the pot.
Make One Leaf
With green, ch 11.
First Side
Starting in the second ch from the hook, work one stitch into each chain:
Sl st, sc in next 2 ch, hdc in next 3 ch, sc in next 3 ch, sl st in final ch.
You have worked into ten chains.
Return Side
Rotate the work and use the unused loops on the opposite side of the foundation chain.
Begin in the same end chain that holds the last slip stitch:
Sl st, sc in next 3 ch, hdc in next 3 ch, sc in next 2 ch, sl st in final ch.
Fasten off with a sewing tail.
Count: 20 worked stitches around the leaf, including 4 slip stitches.
The join end is the leaf base. Shape gently without stretching the foundation chain.
Assembly Map: What Connects to What
Use this map to identify the parts before sewing. It describes their connections rather than their finished proportions.
| Part | Attachment | Check before closing |
|---|---|---|
| Lower disc: 24 stitches | Inside the pot base; stitches catch the disc, covered wire loop, and base fabric. | The wire loop lies flat and cannot rotate freely. |
| Upper disc: 30 stitches | Match one disc stitch to each of the 30 pot stitches in Round 14. | Keep the reverse-sc rim above the seam. |
| Stem tube: 6 stitches around | Lower opening joins the disc center; upper opening joins the bloom base. | The folded, taped wire end remains enclosed beneath the flower. |
| Bloom opening: 12 stitches | Stitches 1, 4, 7, and 10 meet at the center; sew the remaining openings closed. | Enclose stuffing without pulling the bloom flat. |
| Leaf | Sew its base and a short section of its lower edge to the stem tube. | Keep its attachment clear of the flower seam. |
Visual Guide: Stem, Wire and Support Discs
Compare the two support discs and the open-ended stem tube before assembling the covered wire inside the pot.
Open this guide at a larger size.
Build the Support Inside the Pot
Complete this stage before attaching the flower.
Prepare the Wire
Measure the depth of the pot and the length of the stem cover. Cut wire long enough to span both, with additional length for a flat lower loop and a folded upper end.
Bend the lower end into a closed, flat loop that fits comfortably within the pot base. Cover the wire, loop, and cut end with floral tape.
Leave the upper end available for trimming and folding after the crochet parts are threaded onto it.
Anchor the Lower Loop
Place the lower crochet disc inside the pot.
Set the covered wire loop flat against it, with the upright section near the center.
Using beige yarn, sew over the covered loop at several points, catching both the disc and the pot’s base fabric. Distribute the stitches around the loop so the wire cannot easily rotate.
Do not rely on stuffing to anchor the wire.
Add the Upper Disc and Stem Cover
Pass the upper end of the wire through the central opening of the upper disc.
Slide the green stem cover over the wire above the disc.
Trim the wire as needed, then fold its upper end back with pliers and cover it thoroughly with tape. The finished support should end just below the upper edge of the green tube, without projecting into the flower.
Do not force an oversized taped end through the crochet. Adjust the folded end while it is accessible, then draw the stem cover over it.
Tighten the upper disc’s magic ring gently around the covered wire. Secure its tail without constricting or cutting into the tape.
Sew the lower edge of the green tube to the fabric around the disc’s center.
Fill and Close the Pot
Add fiberfill around the support, distributing it evenly.
Keep the bottom reasonably flat. Excess stuffing can turn the base into a dome and make the pot rock.
Position the upper disc inside the pot, just below the raised rim. Match its thirty outer stitches to the thirty stitches of Round 14.
Sew around the edge, catching the pot fabric beneath the reverse-sc trim. Before finishing the seam, check that the stuffing is enclosed and the stem is centered.
Close the seam and weave in the tail.
Attach the Bloom and Leaf
Place the flower’s magic-ring base over the top of the green tube.
Sew the tube’s upper edge to the underside of the flower, distributing stitches around the join. Keep the covered wire enclosed beneath it.
Check the connection before fastening off. The bloom should not swivel freely on one or two sewing stitches.
Attach the leaf approximately halfway up the visible stem. Sew its base to the green tube and add a short attachment along one lower edge so the leaf holds its direction.
Angle the leaf outward and upward.
Check the Finished Display
Place the pot on the surface where it will stand.
If it rocks, check whether the base is rounded by stuffing or whether the lower wire loop is uneven. Correct the cause rather than bending the stem sharply to compensate.
If the flower leans, inspect both the lower wire anchor and the flower-to-stem seam. A heavier yarn may also require a stiffer support.
The tulip flower in pot amigurumi crochet pattern combines soft crochet with a structural insert, so assess the complete assembly before making additional pots.
Practical Finishing Tips
- Keep the upper bloom lightly stuffed. Dense filling makes the four top folds harder to form.
- Spread the lower anchoring stitches. Sewing repeatedly through one spot can distort the pot base.
- Close the pot only after checking the support. Internal adjustments are easier while the disc is still partly open.
- Secure the leaf in two places. A single attachment can allow it to rotate around the stem.
Frequently Asked Questions
Can beginners make this tulip flower in pot amigurumi crochet pattern?
The crochet uses common amigurumi stitches, but the shaped flower closure and supported assembly require additional care. Complete the parts individually and read the entire assembly section before cutting the wire.
Can I leave out the wire?
You can make a soft version, but the narrow unstuffed stem will not support the flower upright in the same way. That would need a different construction or a different display position.
Why does the upper disc have thirty stitches?
It matches the thirty-stitch upper section of the pot, allowing the pieces to be sewn together evenly below the rim.
How do I clean the finished tulip?
Follow the yarn’s care instructions and account for the enclosed wire and tape. Gentle surface cleaning is preferable to soaking the assembled decoration.
Can I put several flowers in one pot?
A larger arrangement needs a wider pot, a matching upper disc, and support for each stem. The single-flower pot should not simply be filled with additional stems without checking its balance.
More Ways to Make Crochet Tulips
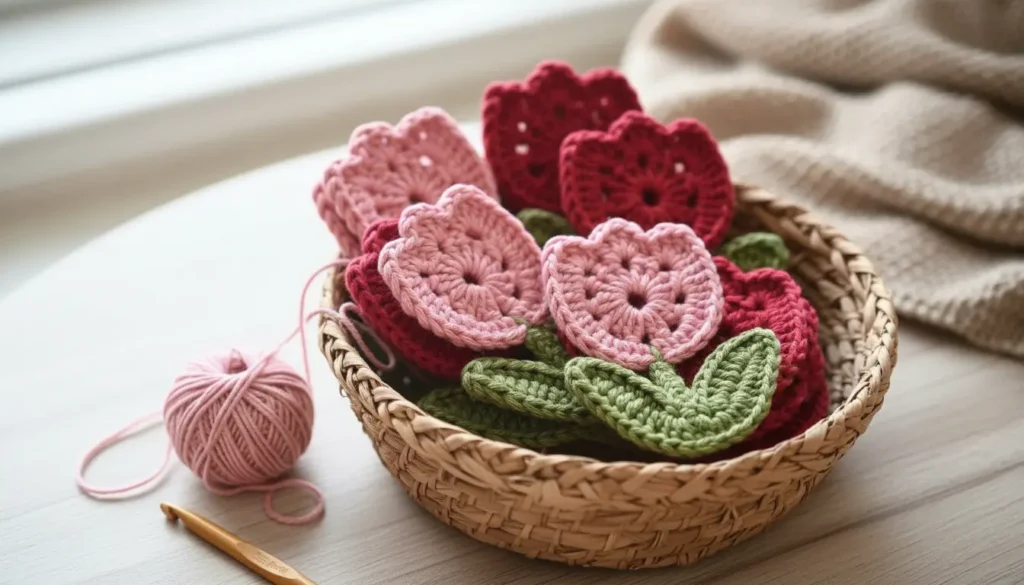
For a flower decoration that can be sewn onto fabric, the crochet tulip bouquet appliqué pattern combines a small bud, leaf, and wrapper.
For a mixed display of separate flower heads, explore the crochet floral stem bouquet pattern.
A red bloom and beige pot give this version a strong contrast. You can change the flower color while keeping the same yarn type and construction.
If you share your finished tulip, include its height and the yarn you used. Those details help other crocheters understand the scale of the project.