A narrow red border, a cream center, and two small brown seeds are enough to bring an apple slice to mind. This crochet apple slice coaster pattern builds those details around a simple circular base, with a short stem and green leaf extending beyond the edge.
For a coaster, the finishing deserves as much attention as the stitches. Raised decorations and bulky knots can make a cup wobble, so the seeds are embroidered directly onto the fabric. The stem and leaf sit outside the area where the cup rests.
Choose red for a classic apple, green for a tart apple-inspired version, or make a mixed set using the same cream yarn throughout. Before making several, finish one coaster and check its fit beneath the cup you plan to use.

Gather Your Yarn and Tools
- Worsted-weight yarn, category 4, in cream, red, brown, and green.
- A 3.5 mm or 4 mm crochet hook, selected to suit your yarn and tension.
- Yarn needle.
- Scissors.
- Stitch marker.
Cotton is a practical choice for a coaster that may encounter condensation or small spills. Choose yarn with care instructions suitable for regular washing, and check whether the red and green colors bleed before washing the completed piece.
The finished diameter depends on your yarn, hook, and tension. Use the cup-fit check below rather than relying on a fixed measurement.
Skills used: working into a magic ring, single crochet increases, joined rounds, crocheting along both sides of a foundation chain, and simple embroidery.
Abbreviations and Reading Notes
This pattern uses US crochet terminology.
| Abbreviation | Meaning |
|---|---|
| ch | chain |
| sc | single crochet |
| hdc | half double crochet |
| dc | double crochet |
| sl st | slip stitch |
| st / sts | stitch / stitches |
| inc | work 2 sc in the same stitch |
For a reference while you work, the Craft Yarn Council’s crochet abbreviation guide explains standard stitch abbreviations and includes US and UK terminology.
Instructions in parentheses followed by “6 times” are repeated six times in total. For example, “(sc in next 2 sts, inc) 6 times” uses 18 stitches from the previous round and produces 24 stitches.
Crochet Apple Slice Coaster Pattern: Center and Peel
The coaster base is worked in joined rounds without turning.
At the beginning of each round, ch 1. This chain does not count as a stitch. Work the first stitch into the same stitch as the joining slip stitch, then join the completed round with a sl st to its first sc.
Do not work into the joining slip stitch or beginning chain. Mark the first sc if it is difficult to distinguish.
Cream Center
Round 1: With cream yarn, make a magic ring. Ch 1 and work 6 sc into the ring. Pull the ring closed and join to the first sc. (6 sts)
Round 2: Ch 1, inc in each st around. Join. (12 sts)
Round 3: Ch 1, (sc in next st, inc) 6 times. Join. (18 sts)
Round 4: Ch 1, (sc in next 2 sts, inc) 6 times. Join. (24 sts)
Round 5: Ch 1, (sc in next 3 sts, inc) 6 times. Join. (30 sts)
Round 6: Ch 1, (sc in next 4 sts, inc) 6 times. Join. (36 sts)
Round 7: Ch 1, (sc in next 5 sts, inc) 6 times. Join. (42 sts)
Round 8: Ch 1, (sc in next 6 sts, inc) 6 times. Join. (48 sts)
Fasten off the cream yarn.
Lay the center on a flat surface before adding the border. A slight angular outline can occur where increases line up. Pronounced cupping or waves should be investigated before continuing.
Red Peel Border
Attach red yarn with a sl st in any stitch of Round 8.
Round 9: Ch 1, beginning in the same stitch where you attached the yarn, (sc in next 7 sts, inc) 6 times. Join to the first sc. (54 sts)
Fasten off.
This version has a continuous circular border. There are no additional shoulder increases or bottom decreases.
Check the Size Before Adding Details
Place an empty cup on the base. Its entire bottom should fit inside the coaster, with some fabric visible beyond it.
If you need a larger version, replace the standard red Round 9 with these two rounds:
- Round 9, cream: Ch 1, (sc in next 7 sts, inc) 6 times. Join. (54 sts)
- Round 10, red: After fastening off cream and attaching red, ch 1, (sc in next 8 sts, inc) 6 times. Join. (60 sts)
Do not work both border options. The standard coaster ends with 54 red stitches; the larger option ends with 60 red stitches.
Choose One Base: Round-by-Round Check
| Round | Standard base | Larger base | Stitches |
|---|---|---|---|
| 1–8 | Cream | Cream | 6, 12, 18, 24, 30, 36, 42, 48 |
| 9 | Red; finish the base | Cream; continue | 54 |
| 10 | Not worked | Red; finish the base | 60 |
The larger option adds one cream round before the red border. It does not add a second red border to the standard base. On either version, each increase round adds exactly six stitches.
Visual Guide: Standard and Larger Coaster Options
Choose one size route. For the larger version, replace the standard red Round 9 with the cream increase round and add the red edge in Round 10.
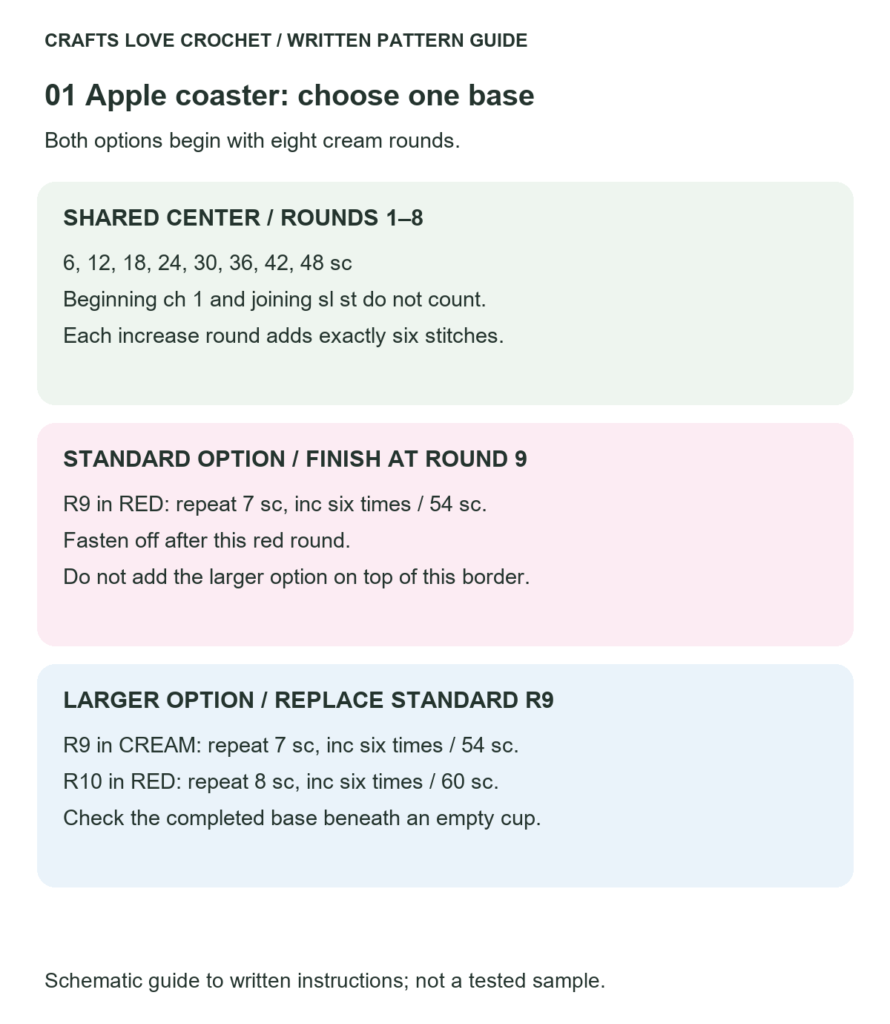
Open this guide at a larger size.
Add the Stem and Leaf
Choose one point along the red edge to be the top of the apple. Place a marker there so the decorations and seeds share the same orientation.
Brown Stem
With brown yarn, ch 8.
Row 1: Sc in the second ch from the hook and in each remaining ch. Turn. (7 sts)
Row 2: Ch 1, sc in each st across. (7 sts)
Fasten off, leaving a sewing tail.
Position one short end of the stem against the back of the marked top edge, with the rest extending away from the circle. Sew that short end securely to the border. Keep the attachment close to the edge so it does not create a lump beneath the cup.
Green Leaf
With green yarn, ch 7.
Work along the foundation chain as follows:
- Sc in the second ch from the hook.
- Hdc in the next ch.
- Dc in each of the next 2 ch.
- Hdc in the next ch.
- Work 3 sc in the last ch.
The three single crochets turn the work around the far end of the chain.
Continue along the unused side of the foundation chain, working into the five remaining chain positions:
- Hdc in the next ch.
- Dc in each of the next 2 ch.
- Hdc in the next ch.
- Sc in the final ch.
Join with a sl st to the first sc. (13 sts; joining slip stitch not counted.)
Fasten off, leaving a sewing tail. The joined end is the leaf base; the three-sc group forms the opposite tip.
Sew the leaf base beside the stem, allowing the leaf to extend outward. Secure its base without pulling the red border inward.
Leaf Foundation Map
For ch 7, number the chains from the starting end to the hook. Chain 7 is skipped. On the first side, work into chains 6, 5, 4, 3, 2, and 1; on the return side, work into chains 2, 3, 4, 5, and 6. Chain 1 already holds the three turning stitches.
| Section | Placement | Worked stitches |
|---|---|---|
| First side | sc, hdc, dc, dc, hdc, then 3 sc in the end chain | 8 |
| Return side | hdc, dc, dc, hdc, sc | 5 |
| Total | Do not include the joining slip stitch | 13 |
The two sides use the same foundation chain positions through different loops. Do not make a second foundation chain or add another three-sc group at the return end.
Visual Guide: Leaf Chain Route
Follow the foundation chain out and back. The three-stitch turn belongs at the leaf tip; the joining end forms its base.
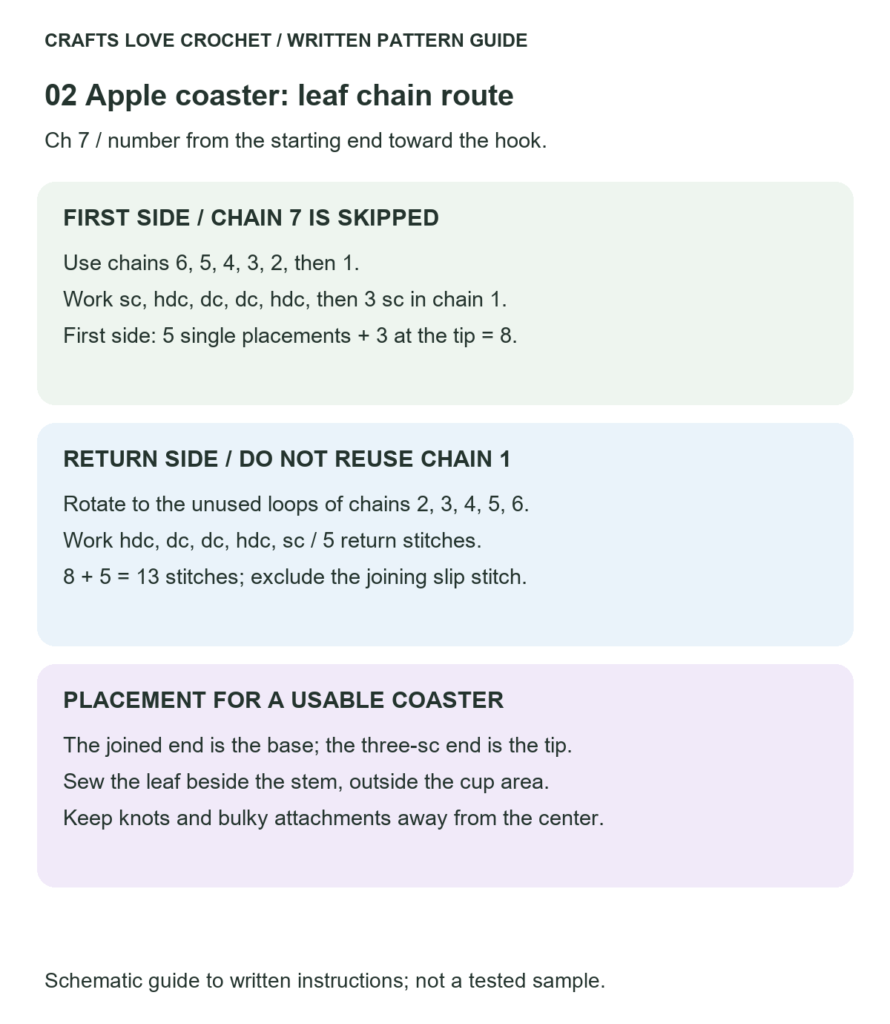
Open this guide at a larger size.
Embroider the Apple Seeds
Use brown yarn and a yarn needle. Keep the embroidery low rather than building thick layers.
Place two small seed shapes on opposite sides of the center ring, roughly within the area covered by Rounds 2–4. Angle their upper ends slightly toward each other.
For each seed:
- Bring the needle up through a gap between stitches.
- Make a short straight stitch spanning approximately one round of the cream fabric.
- Add one adjacent stitch to give the seed a little width.
- Stop before the embroidery becomes noticeably raised.
Secure the yarn by weaving through stitches on the back. Avoid a large knot directly beneath the center, and do not carry a loose strand across the back between the two seeds.
Rest the empty cup on the coaster again. If the embroidery causes rocking, remove the extra layer and use a single stitch for each seed.
Practical Tips for a Flat, Usable Coaster
Count before changing hook size. Each cream round adds six stitches. An accidental stitch in the joining slip stitch can gradually create an uneven edge. Check the totals first if the shape changes unexpectedly.
Match the border yarn to the center. A much thinner red yarn, or tighter tension during the color change, can draw the edge inward. Use yarns of comparable thickness and keep the red stitches relaxed.
Spread out the woven ends. Weaving several tails through the same small area creates a ridge. Distribute them through different sections of the fabric, checking both sides as you go.
Treat blocking as finishing, not repair. Light shaping may smooth minor irregularities. It will not reliably fix missed increases, extra stitches, or a border that is too tight.
Keep the cup area clear. The leaf and stem belong beyond the circular base. Moving them inward may look decorative but leaves less usable space.
These finishing checks are especially useful when making a set from the crochet apple slice coaster pattern. Complete one piece first, then use the same yarn and hook combination for the others.
Finishing and Care
Weave in the remaining tails securely. If your yarn permits wet blocking, dampen the coaster, gently press out excess water with a towel, and shape it into a circle on a flat surface. Let it dry completely.
Follow the yarn label when washing. Reshape the coaster while damp, and allow it to dry thoroughly between uses.
Use it beneath drinking cups and glasses. This single-layer crochet piece is not a potholder or a trivet for cookware.
Questions Before You Make a Set
Is this crochet apple slice coaster pattern suitable for beginners?
It is approachable if you can work single crochet increases and identify the first stitch of a joined round. The leaf introduces half double crochet and double crochet, with each placement written out individually.
Why is my coaster curling upward?
First check the round totals and make sure no increases were missed. If the count is correct, the yarn and tension may need a different hook size. If only the red edge curls, check whether the border yarn is thinner or worked more tightly than the cream center.
Can I leave off the leaf and stem?
Yes. Neither piece changes the base stitch count. The cream center, colored peel, and embroidered seeds still give the coaster its fruit-inspired appearance.
Can I use green instead of red?
Yes. Work the border in green without changing the instructions. A darker green leaf can help it stand out against the peel.
How do I make matching coasters?
Use the same yarn type, hook, round count, and finishing method for every piece. Compare the bases before attaching the decorations, and record any adjustments made to your first coaster.
More Fruit-Inspired Crochet
If you want an apple decoration to attach to another project, visit the crochet apple slice appliqué pattern. It offers another way to use the cream, red, brown, and green palette beyond the table.
For a larger project with fruit details, explore the Strawberry Garden tote bag crochet pattern, which combines a bag with separately attached strawberry decorations.
Making your apple coaster in a different color? Share your yarn choice and finished diameter in the comments—those details help other crocheters plan their own sets.