This crochet apple slice applique pattern combines a cream center, a red skin border, and two embroidered brown seeds. A small stem and green leaf complete the stylized fruit motif.
The main piece is a circular cross-section rather than a wedge. Its simple outline leaves the contrasting colors and embroidered details to suggest the apple, while the separate stem and leaf let you adjust the final arrangement before sewing.
The construction is divided into four parts: the round center and border, the stem, the leaf, and the embroidered seeds. Count the stitches before each color change so the border follows the center evenly.

Materials for the Crochet Apple Slice Applique Pattern
- Worsted-weight yarn in cream for the apple flesh.
- Red yarn for the skin.
- Brown yarn for the stem and seeds.
- Green yarn for the leaf.
- A 3.5 mm crochet hook as a starting point.
- A tapestry needle.
- Scissors.
- Stitch markers.
- A measuring tape.
- Matching yarn or suitable sewing thread for attaching the finished appliqué.
Use similar yarn thicknesses for the cream center and red border.
If attaching the motif to a washable item, choose yarn and sewing materials with compatible care instructions.
Finished measurements depend on your yarn, hook, and tension. Complete and measure one sample before making a set that needs to fit a specific space.
Abbreviations and Techniques
This pattern uses US crochet terminology.
- ch: chain.
- sl st: slip stitch.
- sc: single crochet.
- hdc: half double crochet.
- dc: double crochet.
- inc: work 2 sc into the same stitch.
- sc2tog: single crochet two stitches together.
- st / sts: stitch / stitches.
- MR: magic ring.
- FO: fasten off.
For standard abbreviations and a comparison of US and UK terms, consult the Craft Yarn Council’s crochet abbreviation guide.
Single Crochet Decrease
Insert the hook into the next stitch and pull up a loop.
Insert the hook into the following stitch and pull up another loop.
Yarn over and pull through all three loops on the hook.
This decrease uses two stitches and produces one stitch.
Crochet Apple Slice Applique Pattern: Construction Notes
Work the cream center and red border in joined rounds without turning.
Beginning ch-1 stitches do not count as stitches. Work the first sc into the stitch at the base of the chain and join to the first actual sc.
Do not work into the joining slip stitch on the following round.
The stem is worked in turned rows.
The leaf is worked around both sides of a foundation chain. Rotate the chain to reach its unused side without turning the fabric over.
Part 1: Cream Apple Center
Round 1
With cream, make an MR.
Ch 1 and work 6 sc into the ring.
Tighten the ring and join with a sl st to the first sc.
Count: 6 sc.
Round 2
Ch 1.
Work an inc into each stitch around.
Join with a sl st to the first sc.
Count: 12 sc.
Round 3
Ch 1.
Repeat 1 sc, inc six times.
Join with a sl st to the first sc.
Count: 18 sc.
Round 4
Ch 1.
Repeat 2 sc, inc six times.
Join with a sl st to the first sc.
Count: 24 sc.
Round 5
Ch 1.
Repeat 3 sc, inc six times.
Join with a sl st to the first sc.
Count: 30 sc.
Round 6
Ch 1.
Repeat 4 sc, inc six times.
Join with a sl st to the first sc.
Count: 36 sc.
Round 7
Ch 1.
Repeat 5 sc, inc six times.
Join with a sl st to the first sc.
Count: 42 sc.
Fasten off cream.
Lay the center on a level surface before adding the border. Check the counts if it cups or develops waves.
Correct counts are a starting checkpoint; yarn, hook, and stitch tension also affect the fabric. Resolve noticeable distortion before continuing.
Part 2: Red Apple Skin
Round 8
Join red in any stitch of Round 7.
Ch 1.
Beginning in the stitch where you joined the yarn, repeat the following sequence six times:
- Work 1 sc into each of the next six stitches.
- Work 2 sc into the next stitch.
Join with a sl st to the first sc.
Count: 48 sc.
Each repeat uses seven cream stitches and produces eight red stitches.
Fasten off and weave in the end.
This round forms a continuous red outline. No additional stitches or bottom indentation are added.
Visual Guide: Cream Center and Red Edge Counts
Check the cream circle before changing to red. Each of the six border repeats uses seven base stitches.
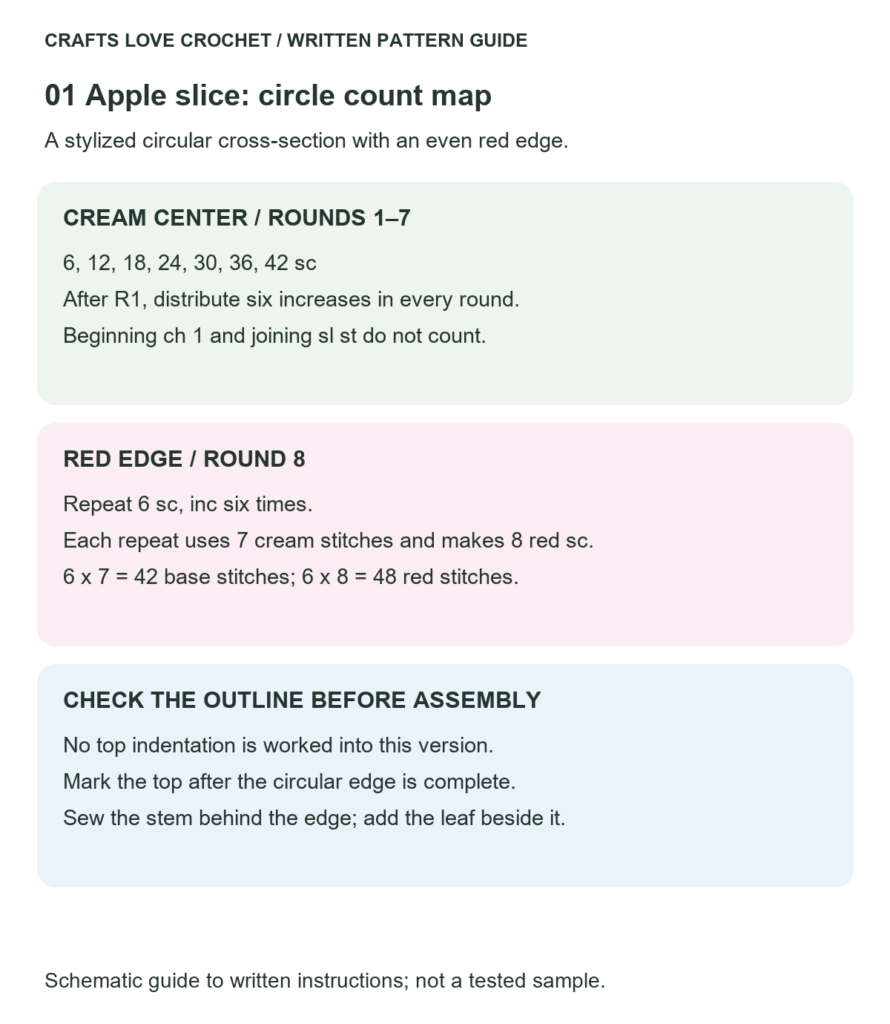
Open this guide at a larger size.
Part 3: Brown Stem
With brown, ch 7.
Row 1
Starting in the second chain from the hook, work 1 sc into each chain.
Count: 6 sc.
Row 2
Ch 1 and turn.
Work 1 sc into each stitch across.
Count: 6 sc.
Row 3
Ch 1 and turn.
Work sc2tog, then 1 sc into each of the next two stitches, then sc2tog.
Count: 4 sc.
Row 4
Ch 1 and turn.
Work 1 sc into each stitch across.
Count: 4 sc.
Fasten off, leaving a long sewing tail.
The wider starting edge will sit behind the apple. The narrower final edge forms the free end of the stem.
Part 4: Green Leaf
With green, ch 8.
First Side of the Leaf
Starting in the second chain from the hook, work:
- 1 sc.
- 1 hdc into the next chain.
- 1 dc into the next chain.
- 1 dc into the next chain.
- 1 hdc into the next chain.
- 1 sc into the next chain.
- 3 sc into the final chain.
Place a marker in the middle stitch of the three-sc group. This will identify the leaf tip.
Second Side of the Leaf
Rotate the foundation chain so you can work along its unused side.
Do not work into the end chain again; it already contains the three-sc turning group.
Across the remaining six chain positions, work:
- 1 sc.
- 1 hdc.
- 1 dc.
- 1 dc.
- 1 hdc.
- 1 sc.
Join with a sl st to the first sc of the leaf.
Count: 15 stitches, excluding the joining slip stitch.
The count is six stitches on the first side, three at the far end, and six on the return side.
Do not fasten off yet.
Leaf Outline and Tip
Beginning in the first actual stitch, work 1 sl st into each of the first seven stitches.
In the marked eighth stitch, work:
Sl st, ch 2, sl st into the same stitch.
Work 1 sl st into each of the remaining seven stitches.
Join to the first outline slip stitch and fasten off, leaving a sewing tail.
Keep these slip stitches relaxed enough that they do not gather the leaf.
Visual Guide: Leaf Tip and Slip-Stitch Outline
Mark stitch 8 before outlining the leaf. It is the middle of the three-sc turning group.
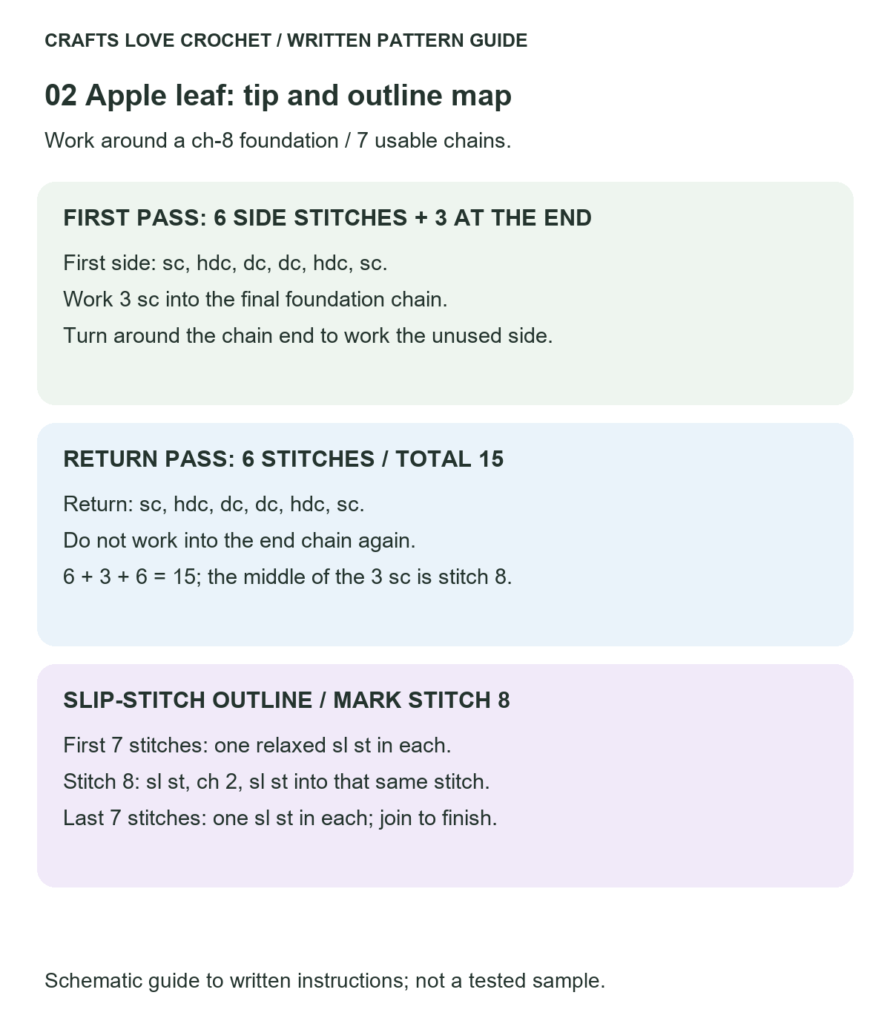
Open this guide at a larger size.
Assembling the Crochet Apple Slice Applique Pattern
Choose the Top
Place the apple center with the side you want to display facing upward.
Choose a point on the red border as the top and mark it. This establishes the orientation of the stem, leaf, and seeds.
Attach the Stem
Position the wide starting edge of the stem behind the top of the apple, leaving the narrower end visible above the border.
Sew the overlapping section securely to the back using several small stitches.
Check the front as you sew so the brown yarn does not form unwanted marks across the cream center.
Attach the Leaf
Place the base of the leaf beside the stem, with the marked tip pointing outward.
Try the position before sewing. The leaf can angle to either side, depending on the arrangement you prefer.
Secure its base and add small holding stitches where needed. Avoid pulling the red edge upward as you tighten the sewing yarn.
Embroider the Seeds
Using brown yarn, mark two seed positions near the center of the cream area, one on either side of the vertical center line.
Keep them inside the cream section and leave a visible space between them.
For each seed, make two or three short, closely placed straight stitches. Vary their length slightly if you want a tapered outline.
Keep the yarn relaxed enough that the cream fabric does not pucker.
Secure the embroidery on the reverse.
Sewing the Appliqué onto Another Project
Finish and shape the motif before attaching it.
Position it on your chosen surface and secure it temporarily with pins or removable markers.
Sew around the red border using matching yarn or suitable sewing thread. Use small stitches and check frequently that neither the appliqué nor the background is being pulled out of shape.
Secure the stem and leaf where necessary so they do not catch during use.
When sewing onto a bag, place a piece of cardboard inside to prevent accidentally stitching its front and back together.
Remove all positioning pins when finished.
Practical Tips
Count Before Joining Red
The cream center must have 42 stitches. The red border uses six seven-stitch repeats, so an incorrect starting count will prevent the sequence from closing evenly.
Keep the Joining Stitch Out of the Count
A slip stitch closes each round but does not add another stitch to the next round. Mark the first actual sc if the join is difficult to identify.
Mark the Leaf Tip Before Working Its Outline
The middle stitch of the three-sc turning group is stitch eight of the leaf. Marking it immediately makes the pointed edging easier to place.
Embroider Before Attaching the Appliqué
Working the seeds while the reverse is accessible makes it easier to secure the ends and avoid stitching through the background fabric.
Compare the Colors Before Making Several Apples
Check that the cream, red, and brown remain distinct. If you plan a matching set, record the yarn and hook used for the first completed motif.
Finishing and Care
Weave in the remaining ends without tightening the center or border.
If blocking, follow the yarn label’s care instructions. Arrange the circular center, stem, and leaf gently, without forcing the fabric into position.
Let the appliqué dry completely before sewing it onto another item.
For washing, follow the care requirements of both the motif and the surface it is attached to.
Frequently Asked Questions
Is This Crochet Apple Slice Applique Pattern Suitable for Beginners?
It is suitable for crocheters who can count joined rounds, work increases and decreases, and sew small pieces. The two-sided leaf requires attention to stitch placement.
Is the Apple a Circle or a Wedge?
This version is a stylized circular cross-section with a stem and leaf. It does not include a wedge shape or an indented whole-apple outline.
How Many Stitches Should the Red Border Have?
The cream center ends with 42 stitches. The red round adds six increases, producing 48 stitches.
Why Does My Leaf Curl After the Outline?
Check whether the slip stitches are tighter than the stitches beneath them. The outline should follow the leaf rather than draw its edge inward.
Can I Change the Size?
Changing the yarn weight and hook can change the dimensions, but the pieces may behave differently too. Make a complete sample before planning a layout or a matching set.
More Crochet Appliqué Ideas
For another decorative motif with a contrasting edge, explore our Crochet Frilly Heart Applique Pattern.
If you enjoy fruit-themed decorations, our Strawberry Garden Tote Bag Crochet Pattern includes a separate appliqué section and instructions for arranging motifs on a bag.
Share Your Apple Motif
If you try this crochet apple slice applique pattern, share your yarn, hook size, finished measurements, and where you attached the motif.
A close-up of the leaf and embroidered seeds can help show how those details change the finished appearance.