Two upright ears and a small white tail give this bunny its recognizable outline. Shown from behind, it needs no embroidered face, leaving the color and placement to do most of the decorative work.
This crochet bunny applique pattern combines a body worked in rows with a separate circular head. Both ears are crocheted directly onto the head, and a small white circle forms the tail.
Use the finished motif on a fabric pouch, a gift bag, or a seasonal panel. Before sewing it in place, try the bunny against the background: a pale motif can disappear on light fabric, while a slightly darker shade makes the ears and rounded body easier to see.

A Few Decisions Before You Start
Choose yarn with care instructions compatible with the item you plan to decorate. If the appliqué will be sewn onto something washable, its yarn and the background fabric should tolerate the same cleaning method.
The tail is a crocheted circle rather than a pom-pom. It gives the bunny a small raised detail without a fringe of loose cut strands.
Skill level: Confident beginner. The project uses short rows, simple shaping, a magic ring, and basic sewing.
Finished size: Depends on yarn and tension. Make one complete motif and measure it against its intended placement before making several.
Materials
- Worsted-weight yarn in the main bunny color.
- White yarn of similar thickness for the tail.
- A 4 mm crochet hook, or a size suited to your yarn.
- Yarn needle.
- Scissors.
- Optional stitch markers.
Use a comfortable, even tension. The appliqué needs enough flexibility to lie against fabric; it does not need the very dense stitches used for stuffed amigurumi.
Abbreviations
This pattern uses US crochet terminology.
| Abbreviation | Meaning |
|---|---|
| ch | chain |
| sl st | slip stitch |
| sc | single crochet |
| hdc | half double crochet |
| dc | double crochet |
| inc | 2 sc in the same stitch |
| dec | single crochet 2 stitches together |
| st / sts | stitch / stitches |
| MR | magic ring |
For a decrease, insert the hook into the next stitch and draw up a loop, then do the same in the following stitch. Yarn over and draw through all three loops.
The Craft Yarn Council’s crochet abbreviation guide is a useful reference for standard stitch names and US–UK comparisons.
Turning chains and joining slip stitches do not count as stitches.
Crochet Bunny Applique Pattern: Shape the Body
With the main color, ch 7.
Row 1: Sc in the second ch from the hook and in each remaining ch. (6 sc)
Ch 1 and turn before each following row.
Row 2: Inc in the first st, sc in next 4 sts, inc in the last st. (8 sc)
Row 3: Sc in each st across. (8 sc)
Row 4: Dec, sc in next 4 sts, dec. (6 sc)
Row 5: Sc in each st across. (6 sc)
Fasten off, leaving a sewing tail.
The foundation edge is the bottom of the bunny. Row 5 is the upper edge where the head will overlap.
There is no additional edging round on the body.
Check the Shape
The stitch counts should read:
6 — 8 — 8 — 6 — 6
The middle rows are wider than the first and last rows. If one side looks uneven, check that both increases and both decreases were worked at the row edges.
Make the Head and Ears Together
With the main color, make a magic ring.
Round 1: Ch 1, work 6 sc into the ring, and pull it closed. Join with a sl st to the first sc. (6 sc)
Round 2: Ch 1. Starting in the same stitch as the join, work 2 sc in each stitch around. Join to the first sc. (12 sc)
Do not fasten off.
For the ear placement, call the first sc of Round 2 stitch 1. The next two stitches are stitches 2 and 3.
First Ear
From the join at stitch 1:
- Ch 6.
- Sc in the second ch from the hook.
- Hdc in the next ch.
- Dc in the next ch.
- Hdc in the next ch.
- Sc in the final ch.
- Sl st into stitch 1 of the head, where the ear began.
The ear contains five stitches worked along its chain.
Second Ear
Sl st into head stitch 2, then sl st into head stitch 3.
From stitch 3, repeat the same ear:
Ch 6; starting in the second ch from the hook, work sc, hdc, dc, hdc, sc. Sl st back into head stitch 3.
Fasten off with a sewing tail.
There are now two ears, with one head stitch between their attachment points. No further round is worked around the head.
Gently arrange the ears so they point upward and slightly apart.
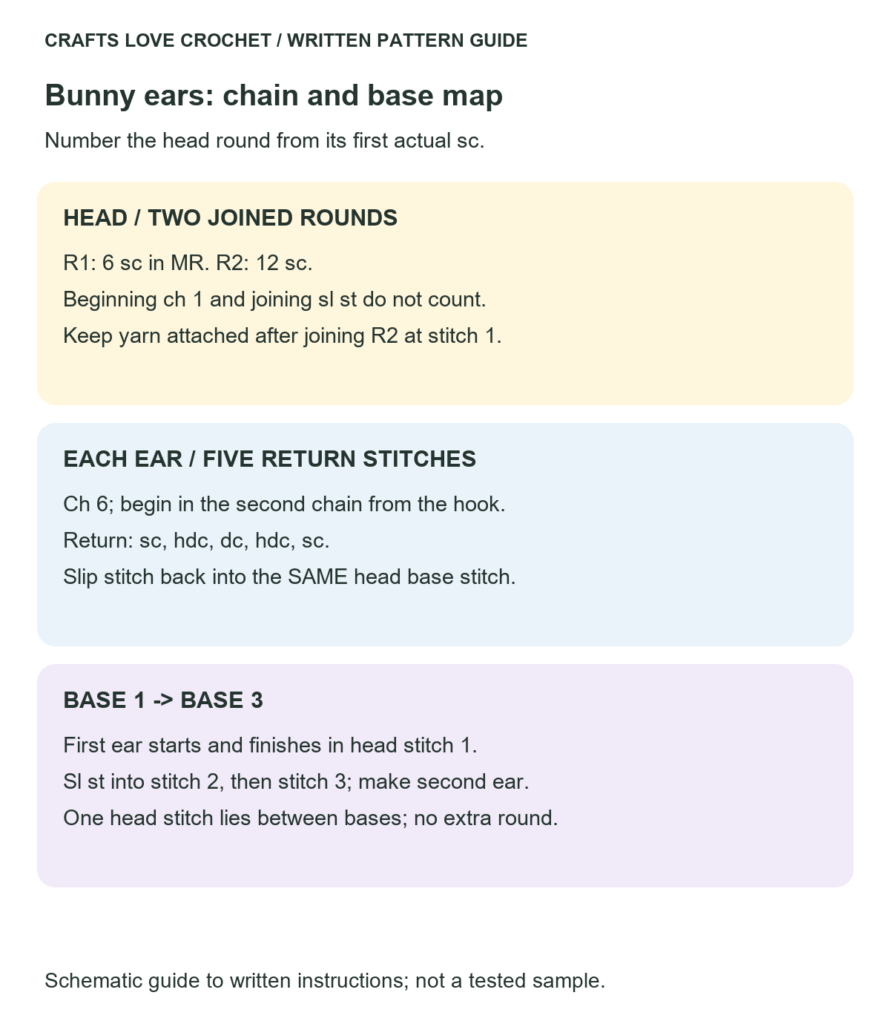
Visual Guide: Ear Chains and Head Attachment Points
Number the twelve head stitches before making the two ears at stitches one and three, returning each ear to its own base.
Open this guide at a larger size.
Crochet the White Tail
With white, make a magic ring.
Ch 1 and work 6 sc into the ring. Pull the ring closed and join with a sl st to the first sc. (6 sc)
Fasten off, leaving a sewing tail.
Keep the circle unstuffed. Its small thickness comes from the crochet fabric itself.
Visual Guide: Body Shaping and Silhouette Assembly
Check the five body-row counts and the head overlap before attaching the unstuffed white tail to the lower half.

Open this guide at a larger size.
Assemble the Bunny Silhouette
Lay all three pieces on a flat surface before sewing.
Join the Head to the Body
Place the head above the body with both ears pointing upward.
Overlap the lower portion of the head slightly over the center of Row 5. Keep the ears clear of the body and check that the head is centered.
Using the main-color tail, sew across the overlapping area with several small stitches. Catch both pieces without pulling the body’s upper edge into a gather.
Secure the join from the back. Do not attach the head at only one central point, as that allows it to rotate.
Position the Tail
Place the white circle on the lower half of the body, centered from side to side.
Sew around the circle’s edge, catching the body fabric beneath it. Keep the stitches snug enough to hold the tail without drawing the body inward.
Secure the yarn on the back.
Weave in the Ends
Weave each tail through several stitches and change direction before trimming.
Spread the tails through different areas rather than placing them all behind the head-to-body join. A bulky knot or bundle can make the appliqué sit unevenly against its background.
Sew the Appliqué onto Your Project
Position the bunny on the receiving fabric and hold it temporarily with suitable pins or removable basting stitches.
Sew around the body and head using small stitches in a matching color. Support the neck join as you work.
For items that will be handled or washed, add discreet attachment stitches along the ears, including near their tips. This helps prevent the ears from catching and folding backward.
Check the reverse side of the receiving fabric as you sew. Avoid catching an unintended layer, such as the back of a pocket.
For another small motif to place nearby, the daisy flower crochet appliqué pattern includes a flower, stem, and leaves that can be arranged beside the bunny.
Practical Tips for a Clear Outline
Keep the ear chains relaxed. Tight chains make the return stitches harder to work and can cause one ear to curl more than the other.
Compare both ears before assembly. Each should contain five stitches in the same order. A missing half double crochet changes the profile.
Keep the tail in proportion. The six-stitch circle is meant to sit within the body outline, leaving the main color visible around it.
Inspect the overlap from the front. Too much overlap hides the upper body; too little creates a weak-looking connection between the two pieces.
Shape gently. If the yarn permits damp blocking, lay the motif flat, arrange the ears, and allow it to dry. Do not stretch it to compensate for missing stitches.
These checks help the crochet bunny applique pattern retain a recognizable outline even when you change the main color.
Frequently Asked Questions
Is this crochet bunny applique pattern suitable for beginners?
It is suitable for crocheters who know basic stitches and are ready to practice increases, decreases, and a small amount of sewing. The body has only five rows, so its shaping is easy to check as you work.
Is the bunny shown from the front or the back?
This version is a back-view silhouette. The white tail is visible, and no facial embroidery is included.
Can I use another yarn weight?
Yes. Use an appropriate hook and keep the head, body, and tail yarns similar in thickness. The finished size will change, so check one complete motif before planning a larger arrangement.
Does the appliqué need stuffing?
No. The body, head, ears, and tail are all unstuffed. This keeps the motif relatively flat for sewing onto fabric.
Can I make several bunnies for a decorative panel?
Yes. Finish one first, then use the same yarn and hook combination for the remaining motifs. Arrange them on the panel before sewing so their spacing is consistent.
Color and Arrangement Ideas
A row of pastel bunnies can work across a seasonal fabric panel, while one neutral-colored bunny makes a simpler accent on a pouch. Leave enough background visible around the ears so the silhouette remains distinct.
If you want to add another animal-inspired motif, explore the crochet butterfly pattern, which includes an appliqué option without keyring hardware.
Keep a note of the finished bunny’s height and width if you plan to repeat the project. Those measurements are more useful for placement than the yarn label alone.
Where will your bunny go? Share the background color and yarn combination you chose—contrast can make a surprisingly big difference to this little motif.