This cat keychain strap crochet pattern combines a narrow, flat body with a small rounded head, stitched facial details, and a hanging loop. Short chain-based arms, legs, and a tail give the strap its cat silhouette without adding several stuffed components.
The body is worked in rows, while the head is crocheted separately in continuous rounds. Sewing the head onto the upper front of the strap makes its position easier to adjust before finishing.
The hanging loop connects to both upper corners of the body. A row of single crochet reinforces the chain, and a keyring provides the hardware connection.

Materials for the Cat Keychain Strap Crochet Pattern
- Worsted-weight cotton yarn in orange.
- Small amounts of smooth black yarn or embroidery thread for the face.
- Pink yarn or embroidery thread for the nose.
- White yarn for optional embroidered muzzle and paw details.
- Brown or dark orange yarn for optional stripes.
- A 2.5–3.0 mm crochet hook as a starting range.
- A small amount of polyester fiberfill.
- A yarn needle.
- A stitch marker.
- A keyring.
- Scissors.
Choose a hook that produces a reasonably close fabric without making the stitches difficult to work. The suggested hook range may need adjustment for the thickness of your particular yarn.
Finished length depends on yarn, hook, tension, and the hanging loop. Measure the completed sample rather than relying on a fixed size estimate.
Construction and Orientation
In this cat keychain strap crochet pattern, the body is a rectangle six stitches wide and 18 rows long.
Keep these reference points in mind:
- Row 1 is the bottom: the legs attach near this end.
- Row 18 is the top: the hanging loop attaches here.
- The head sits on the upper front: its back is sewn over the upper body rows.
- The arms attach below the head.
- The tail attaches near the lower back.
The head is a separate component. It is not worked around the edge of the strap.
For the body, beginning ch-1 does not count as a stitch. Work the first sc into the first actual stitch of the row.
For the head, work in continuous rounds without joining or adding beginning chains. Move the marker to the first stitch of each new round.
Abbreviations — US Terms
- MR: magic ring.
- ch: chain.
- sl st: slip stitch.
- sc: single crochet.
- hdc: half double crochet.
- inc: work 2 sc into one stitch.
- dec: single crochet decrease.
- st / sts: stitch / stitches.
- FO: fasten off.
For the head, you can use an invisible decrease: insert the hook through the front loops of the next two stitches, yarn over and pull through those loops, then yarn over and pull through the remaining two loops.
If you need to check terminology, the Craft Yarn Council’s crochet abbreviation reference includes definitions and a comparison of US and UK terms.
Cat Keychain Strap Crochet Pattern: Flat Body
Use orange yarn.
Foundation
Ch 7.
Row 1
Starting in the second chain from the hook, sc in each chain across.
Count: 6 sc.
Rows 2–18
Ch 1, turn.
Sc in each of the six stitches across.
Count: 6 sc per row.
After completing Row 18, fasten off and weave in the ends.
Check that the rectangle has six stitches in every row. Avoid working into the turning chain, which would increase the width.
Mark the two corners of Row 18 so the top remains easy to identify during assembly.
Visual Guide: Body Orientation and Attachment Rows
Keep Row 18 at the upper end and Row 1 at the lower end when positioning the separate head, arms, legs and tail.
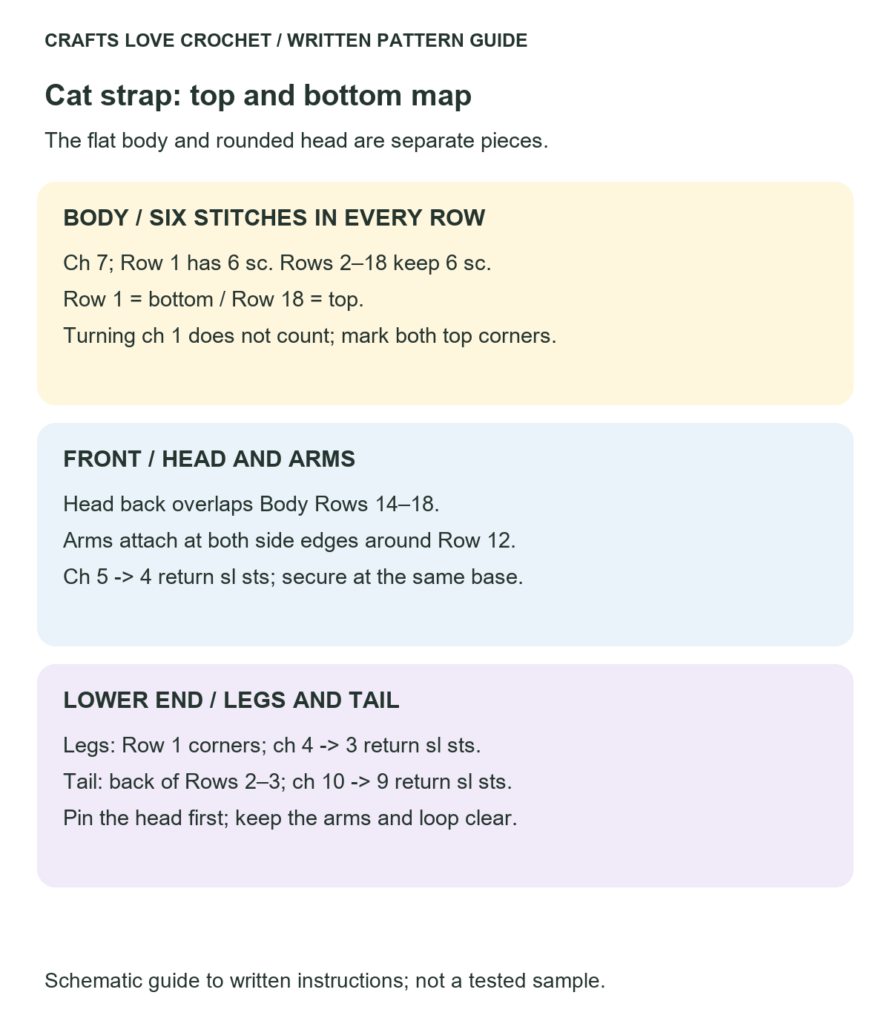
Open this guide at a larger size.
Separate Cat Head
Use orange yarn.
Increase Rounds
- Round 1: Work 6 sc into a MR. (6)
- Round 2: Inc in every stitch. (12)
- Round 3: (1 sc, inc) six times. (18)
- Round 4: (2 sc, inc) six times. (24)
Middle Rounds
- Rounds 5–7: Sc in every stitch. (24 per round)
These are three rounds without increases.
Decrease Rounds
- Round 8: (2 sc, dec) six times. (18)
Add a small amount of stuffing. Keep the head soft enough to sit against the strap without becoming a heavy, tightly packed ball.
- Round 9: (1 sc, dec) six times. (12)
- Round 10: Dec six times. (6)
Fasten off with a tail.
Thread the tail through the front loops of the remaining six stitches and pull gently to close. Secure and bury the end.
Choose which side will become the face before adding the ears or embroidery. The magic ring sits at the crown, and the closing point sits beneath the head.
Ears — Make Two
The ears are small raised groups worked directly onto the head.
Mark two symmetrical positions on the upper sides of the head, around Rounds 3–4.
At the first position:
- Join orange yarn with a sl st through both loops of the selected stitch.
- Ch 1.
- Work sc, hdc, sc into that same stitch.
- Sl st into the adjacent stitch, moving away from the center of the crown.
- Fasten off and secure the ends.
Repeat at the second marked position, mirroring the direction.
Each ear consists of a three-stitch group anchored by a slip stitch. Check both positions before securing the tails.
Reinforced Hanging Loop
Make the loop before sewing on the head so the top corners remain accessible.
Foundation Chain
Join orange yarn with a sl st in one corner stitch of Body Row 18.
Ch 22.
If using a closed hardware ring, slide it onto the chain now.
Without twisting the chain, sl st into the opposite corner stitch of Body Row 18. The chain now forms an arch between the two corners.
Reinforcement Row
Ch 1 and turn so you can work back along the arch.
Work 1 sc into each of the 22 foundation chains, beginning with the chain nearest the second corner. Do not work into the turning ch-1.
After the final sc, sl st into the first corner stitch where the chain began.
Count: 22 sc along the loop.
Fasten off with a sewing tail.
Use the tails to reinforce each loop end against several stitches on the back of the upper body. Keep these seams clear of the space needed for the head.
If using a split keyring, it can be threaded through the completed loop instead of being added during construction.
This is a decorative keychain attachment, not a weight-bearing carrying strap.
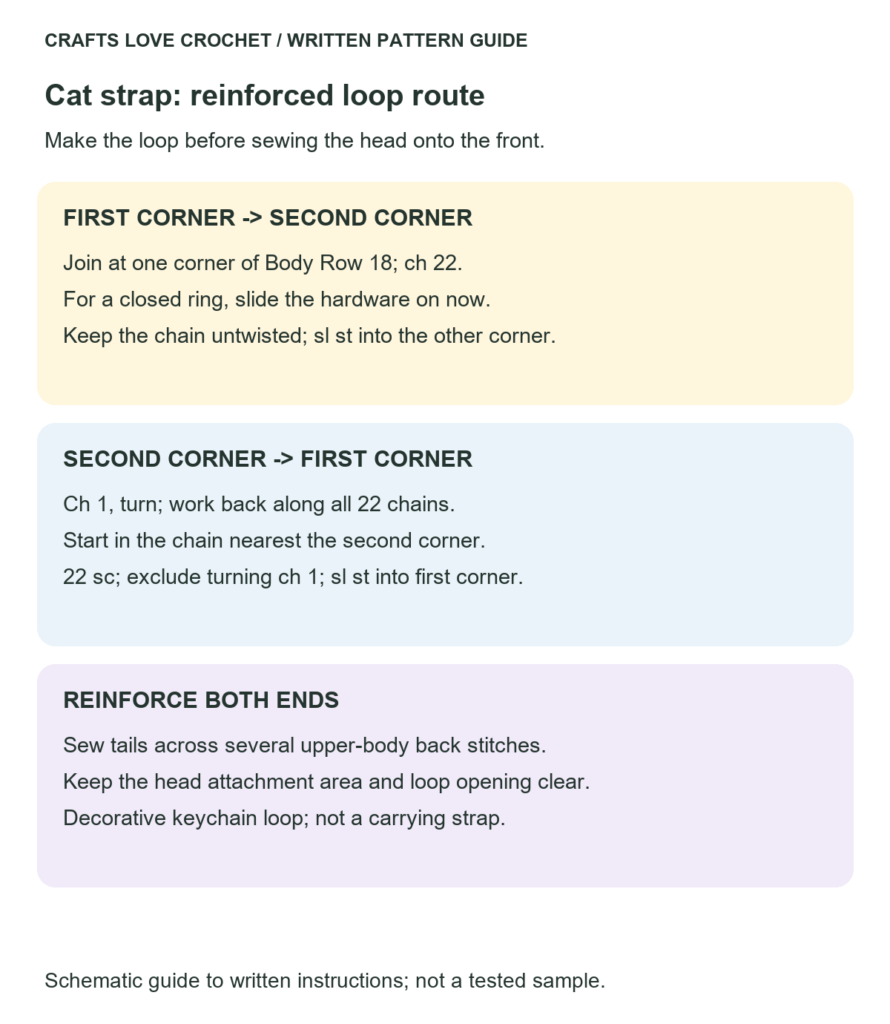
Visual Guide: Reinforced Hanging Loop Route
Follow the chain arch from one upper corner to the other, then work the twenty-two reinforcing stitches back to the starting corner.
Open this guide at a larger size.
Arms — Make Two
Join orange yarn at one side edge of the body around Row 12.
Ch 5.
Starting in the second chain from the hook, work 1 sl st into each chain back toward the body.
Count: 4 sl sts.
Sl st into the same body attachment point, fasten off, and secure the ends.
Repeat on the opposite side at the same row.
The arms should sit below the head. Check their position against the actual head before securing the tails.
Legs — Make Two
Use orange yarn.
Join yarn near one lower corner of Body Row 1.
Ch 4.
Starting in the second chain from the hook, work 1 sl st into each chain back toward the body.
Count: 3 sl sts.
Sl st into the same attachment point. Fasten off and secure the ends.
Repeat near the other lower corner.
If desired, add a small white embroidered stitch at the end of each leg for a paw detail. Secure the embroidery ends within the crocheted stitches.
Tail
Join orange yarn on the back of the body around Rows 2–3.
Ch 10.
Starting in the second chain from the hook, work 1 sl st into each chain back toward the body.
Count: 9 sl sts.
Sl st into the original attachment point.
Fasten off and secure the ends. Let the tail hang freely or add a small stitch to hold it toward one side.
Face Embroidery
Complete the face before sewing the head onto the strap.
Eyes
Mark two positions on the front of the head around Rounds 5–6, with approximately four stitch columns between their centers.
Embroider small eyes or short curved lines using black thread or yarn.
Check the spacing from the front before securing the ends.
Nose and Mouth
Embroider a small pink triangle centered below the eyes.
Add a short black line beneath the nose and two small curves for the mouth, if desired.
Keep the embroidery relaxed enough that it does not pull the face inward.
Whiskers and Optional Markings
Embroider short whisker lines on each side of the face.
For optional stripes, add a few brown or dark orange stitches to the forehead or body. Use attached embroidery rather than loose strands.
White muzzle details can also be embroidered; this version does not include a separate crocheted muzzle.
Assemble the Cat Keychain Strap Crochet Pattern
Place the body with Row 18 at the top and the reinforced loop extending above it.
Position the head against the upper front of the strap, using approximately Rows 14–18 as the attachment area. Keep the face directed outward and leave enough clearance for the loop.
Using a separate length of orange yarn, sew a small area on the back of the head to several stitches across the upper body.
Distribute the seam across more than one row. Avoid attaching the entire head at a single point or sewing through to the visible face.
Check that:
- The body hangs below the head.
- The arms remain visible.
- The loop is not trapped beneath the head.
- The ears and face point in the intended direction.
- The head does not rotate freely on its attachment.
Secure and weave in the sewing ends.
Practical Tips
Count Six Stitches at Every Turn
The strap can widen accidentally if the turning chain is treated as a stitch. Check the first and last stitch of each row.
Work One Head Before Making Several
The relationship between a 24-stitch head and a six-stitch-wide strap depends on your yarn and tension. Assemble one sample before preparing a batch.
Avoid Overfilling the Head
Too much filling adds bulk and can pull the top of the strap forward. Use enough to define the shape without stretching the crochet fabric.
Reinforce Both Loop Ends
The loop connects to two corners. Check both attachment points and secure their tails through several stitches rather than relying only on the joining slip stitches.
Check the Hardware Contact
Make sure the keyring has no rough edge that catches or cuts the yarn. Inspect the loop and its seams periodically, especially where the yarn touches the metal.
Finishing and Care
Weave in all loose ends and inspect the front and back.
Check that the head and loop attachments do not separate under a gentle pull. This check helps reveal loose seams but does not establish a load rating.
Follow the yarn and filling manufacturers’ care instructions. Remove the hardware before washing when possible, and allow the stuffed head to dry completely.
More Cat and Keychain Projects
For another animal-themed accessory, explore the Crochet Goldfish Keychain Pattern, which uses a fish shape rather than a flat strap body.
If you prefer a seated cat with separate paws and a cream muzzle, visit the Fluffy Orange Cat Amigurumi Crochet Pattern.
Frequently Asked Questions
Is This Cat Keychain Strap Crochet Pattern Worked in One Piece?
No. The flat body and rounded head are made separately. The head is then sewn onto the upper front of the body.
The arms, legs, tail, ears, and hanging loop are worked directly onto their respective attachment points.
Does the Loop Need a Button?
No. This version uses a permanently closed hanging loop and a keyring. It does not include a button closure.
Can I Change the Length of the Body?
You can add or remove six-stitch rows, but you will need to reposition the head and arms accordingly. Keep the loop at the upper end and the legs at the lower end.
What Determines the Finished Size?
Yarn thickness, hook size, tension, and the number of body rows all affect the dimensions. Measure the completed piece, including the loop, if you need it to fit a particular space.
Can I Leave Out the Stuffing?
Yes, but the head will collapse into a flatter shape. Check that appearance against the strap before sewing it into place.
Share Your Cat Charm
Keep a note of the yarn, hook, and finished measurements when making this cat keychain strap crochet pattern. Record any changes to the body length or head placement so you can repeat the arrangement.
Share your color choices and construction observations in the comments. If a step needs clarification, include the component and row or round number.