This sun and moon amigurumi keychain pattern brings two contrasting colors together in one rounded charm. A yellow section represents the sun, a cream section represents the moon, and small yellow rays frame the sun side.
The main shape is made from two separate crocheted halves. Each half finishes with 48 stitches, allowing the edges to be matched and sewn together without working two colors in the same round.
The moon is represented by the cream section and its embroidered expression. This construction does not include a separate raised crescent.
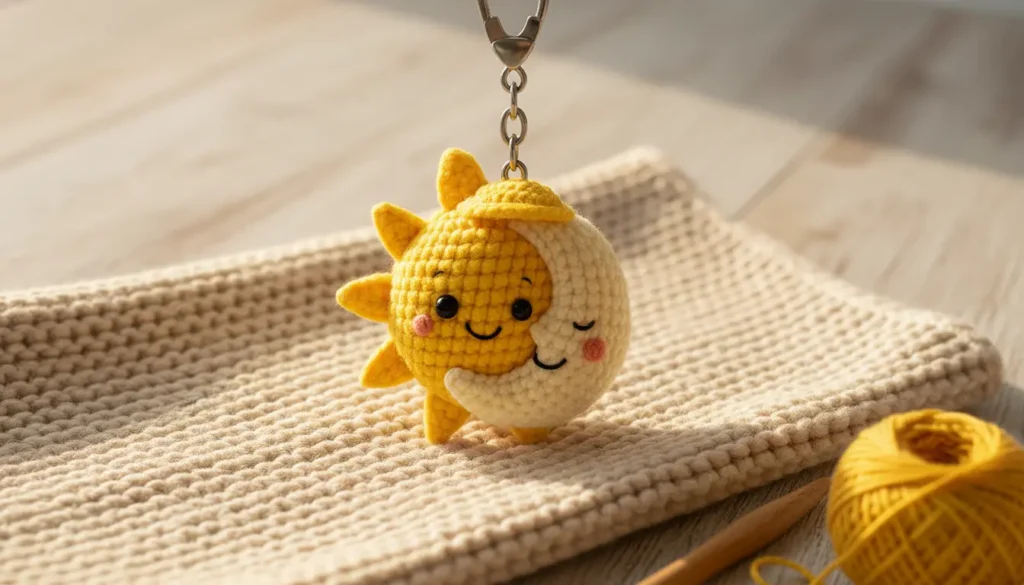
Materials for the Sun and Moon Amigurumi Keychain Pattern
- Worsted-weight yarn in yellow.
- Matching-weight yarn in cream or white.
- Smooth black yarn or embroidery thread for the facial details.
- A small amount of pink yarn for optional embroidered cheeks.
- A 2.5–3.0 mm crochet hook as a starting range.
- Polyester fiberfill.
- A yarn needle.
- Stitch markers.
- A keychain clasp with an attachment ring.
- Scissors.
Use yellow and cream yarns of similar thickness and construction. The two halves need to have compatible edge measurements as well as matching stitch counts.
Choose a hook that produces fabric without obvious filling gaps while allowing you to crochet comfortably.
Finished size, yarn consumption, and completion time depend on the materials and tension used. Measure the completed sample before choosing its final use.
Construction Notes
The sun and moon amigurumi keychain pattern consists of:
- One yellow body half.
- One cream body half.
- Eight yellow rays.
- Embroidered facial details.
- A reinforced crocheted attachment loop.
Work the body halves in continuous rounds. Do not join rounds or add beginning chains unless instructed.
Move a marker to the first stitch of each new round.
The rays are worked back along a foundation chain. Their wider ends are sewn to the yellow section.
Abbreviations — US Terms
- MR: magic ring.
- ch: chain.
- sl st: slip stitch.
- sc: single crochet.
- hdc: half double crochet.
- dc: double crochet.
- inc: work 2 sc into one stitch.
- st / sts: stitch / stitches.
- FO: fasten off.
For a sequence such as “(3 sc, inc) six times,” work one sc into each of the next three stitches and two sc into the following stitch. Repeat that complete sequence six times.
For additional help, consult the Craft Yarn Council’s crochet abbreviation reference, including its US–UK terminology comparison.
Sun and Moon Amigurumi Keychain Pattern: Body Halves
Make one half in yellow and one in cream.
Use the same hook and maintain a similar tension for both pieces.
Increase Rounds
- Round 1: Work 6 sc into a MR. (6)
- Round 2: Inc in every stitch. (12)
- Round 3: (1 sc, inc) six times. (18)
- Round 4: (2 sc, inc) six times. (24)
- Round 5: (3 sc, inc) six times. (30)
- Round 6: (4 sc, inc) six times. (36)
- Round 7: (5 sc, inc) six times. (42)
- Round 8: (6 sc, inc) six times. (48)
Side Rounds
- Rounds 9–12: Sc in every stitch. (48 per round)
These are four rounds without increases.
Sl st into the next stitch to finish. This slip stitch does not add to the count.
Fasten off, leaving a long sewing tail on one half. Secure the starting-ring tail inside each piece.
Do not gather the openings. Each must retain its 48-stitch edge for assembly.
Visual Guide: Matching the Two Circular Edges
Match the two 48 stitch edges using four markers before adding filling.
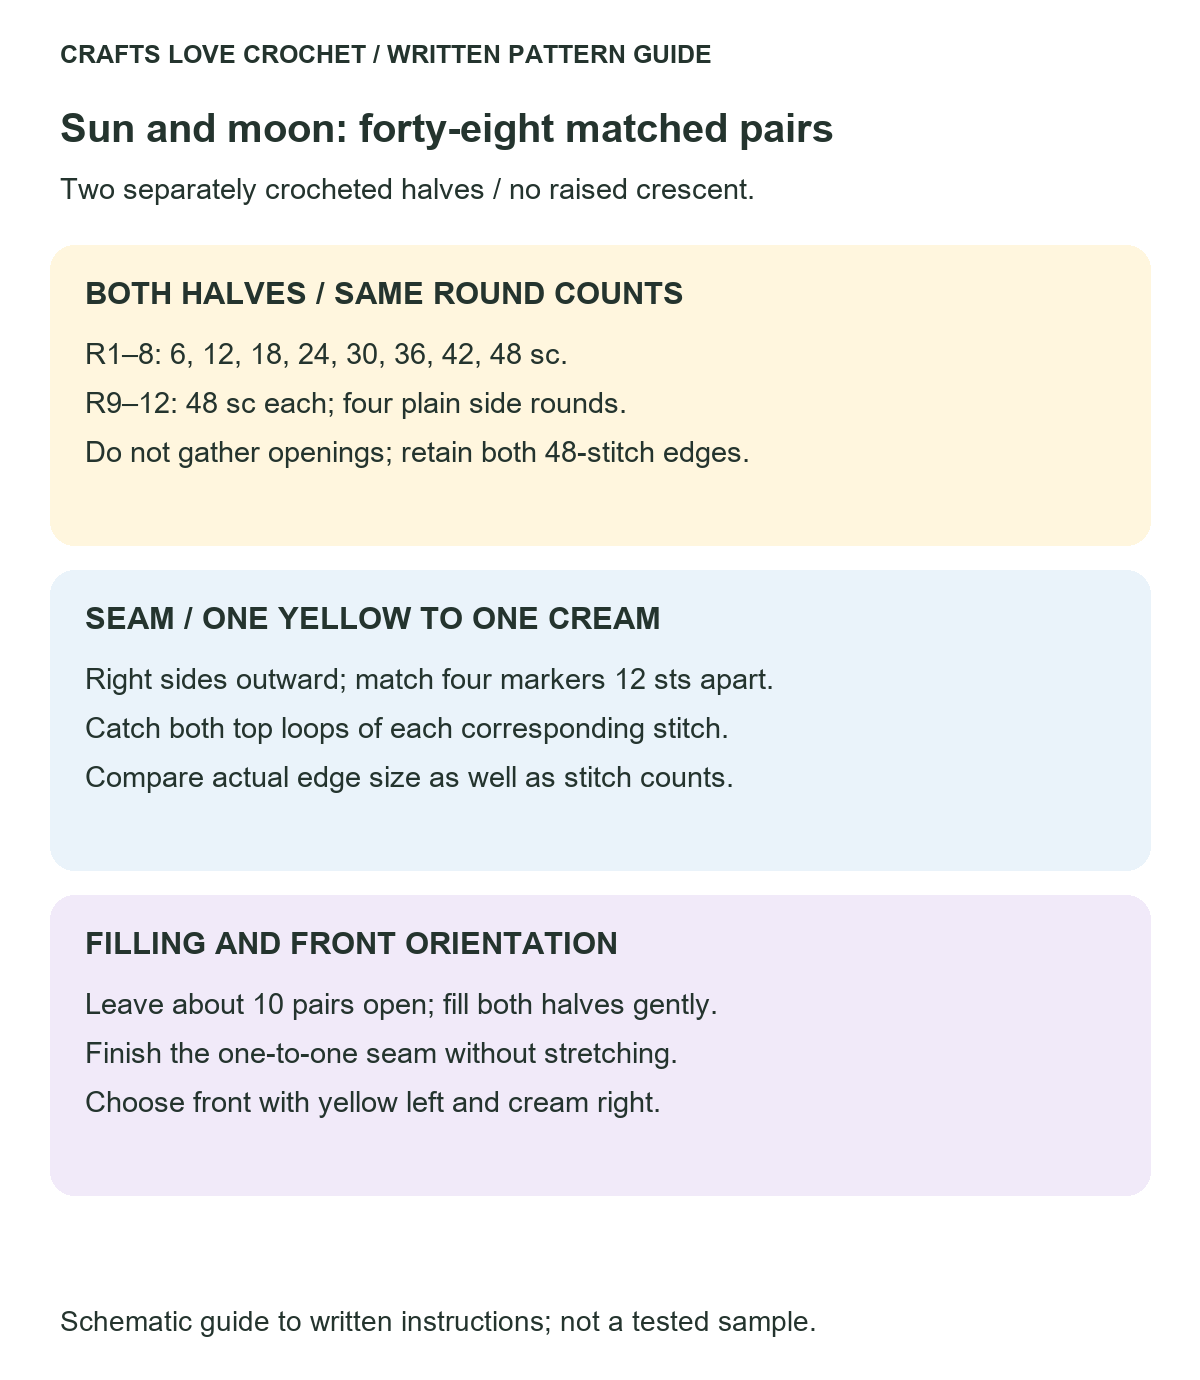
Open this guide at a larger size.
Check the Fit Before Joining
Place the two openings together with the right sides facing outward and the wrong sides facing the interior.
Match one yellow edge stitch to one cream edge stitch.
Use four markers, spaced 12 stitches apart, to hold corresponding points together. Check that the edges meet without stretching one piece tightly or gathering the other.
If the counts match but the edges differ noticeably in size, compare the yarn thickness and tension before sewing.
Join and Stuff the Main Shape
Using the long sewing tail, whipstitch the edges together.
For each sewing stitch, pass through both top loops of one yellow stitch and both top loops of its corresponding cream stitch.
Work around in order, maintaining the one-to-one match.
Leave approximately ten stitch pairs unsewn.
Add filling in small amounts. Distribute it into both halves, then check the seam and overall shape. Avoid packing the filling so firmly that the stitches separate.
Continue sewing, pausing to adjust the filling before closing the final section.
Secure the seam and bury the tail inside the piece.
The join forms a continuous circle around the body. Rotate the finished shape so that, when viewed from the chosen front, the yellow section is on the left and the cream section is on the right.
Sun Rays — Make Eight
Use yellow yarn.
Ch 5.
Starting in the second chain from the hook, work:
- 1 sl st.
- 1 sc into the next chain.
- 1 hdc into the next chain.
- 1 dc into the final chain.
Count: four worked stitches along four foundation chains.
Fasten off with a sewing tail.
The slip-stitch end is the narrow tip. The double-crochet end is the wider attachment base.
Repeat until you have eight matching rays.
Position and Sew the Rays
With the yellow side on the left, look at the outline of the body from the chosen front.
Temporarily position the eight rays along the yellow outer outline, running from near the top of the color division, around the left side, toward the bottom of the division.
Keep the cream outline free of rays. Leave clearance at the top for the keychain loop.
Space the rays visually before sewing. All narrow tips should point outward.
Sew the wider base of each ray to several nearby body stitches. Use more than one attachment stitch so the ray does not pivot around a single point.
Check the front and back as you work, and secure each tail inside the body.
Visual Guide: Eight Rays and the Hanging Loop
Space eight rays around the yellow edge and reinforce both ends of the hanging loop.
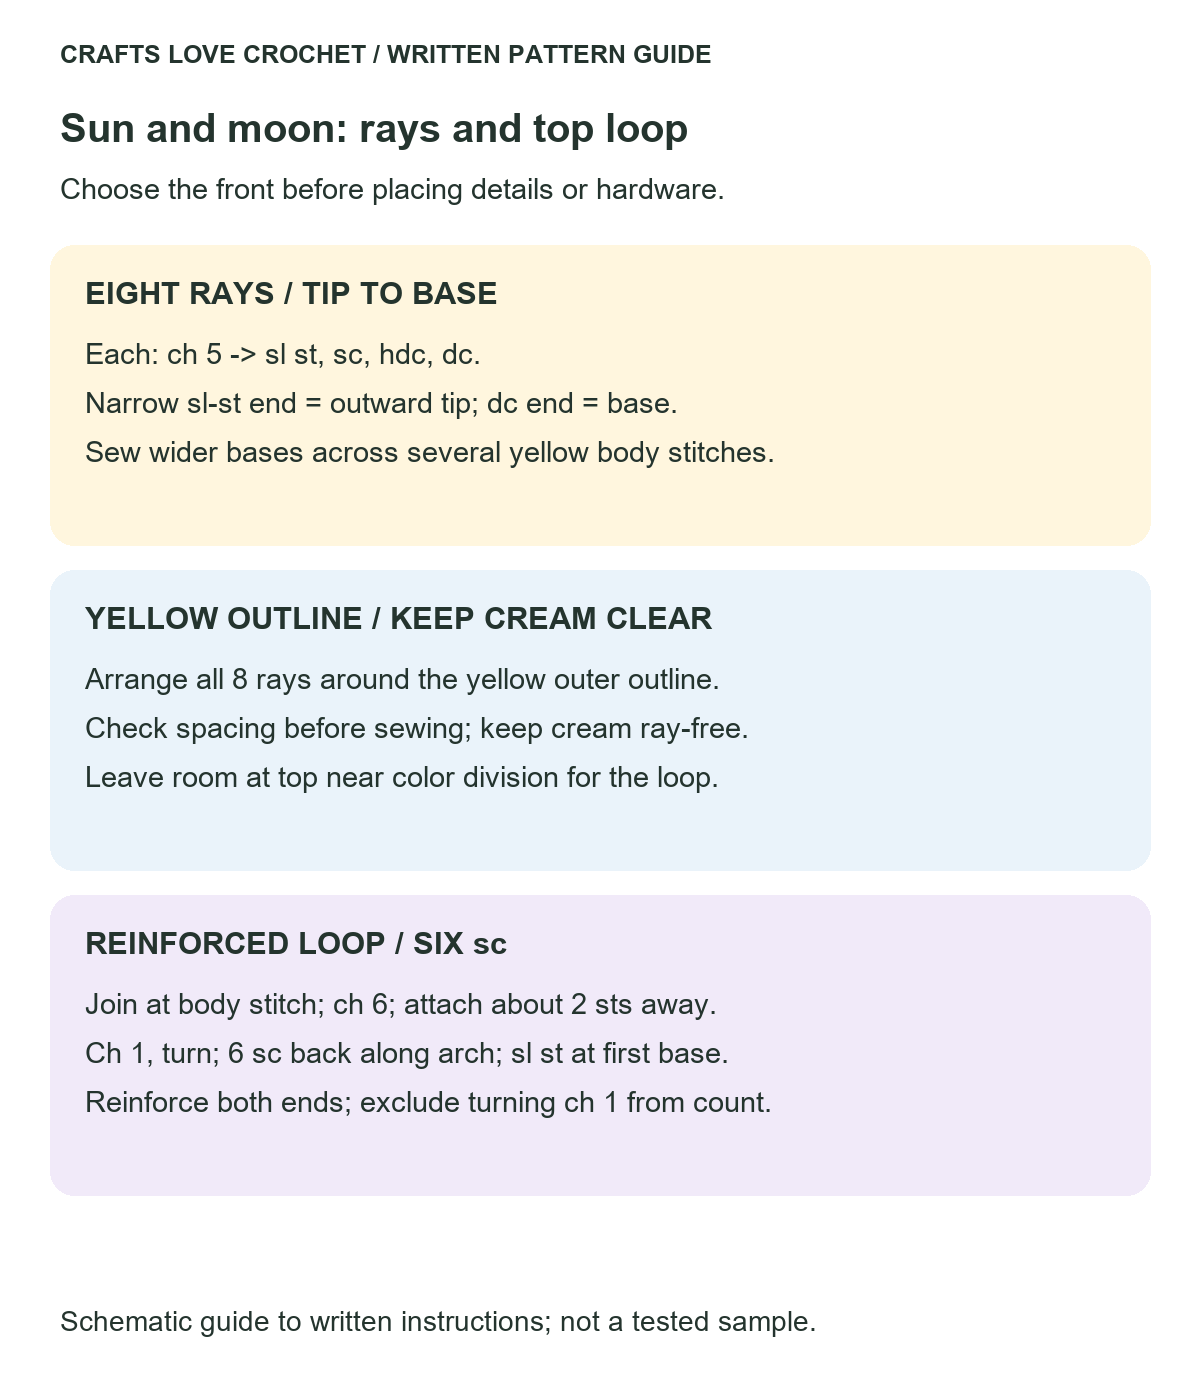
Open this guide at a larger size.
Embroidered Faces
Keep the selected front facing you.
Sun Expression
On the yellow side, embroider two small eyes and a short curved smile beneath them.
Place the expression within the visible yellow area rather than directly against the joining seam. Mark the positions temporarily before stitching.
Moon Expression
On the cream side, embroider two short curved lines for closed eyes and a small smile below.
Keep both expressions at a similar height, leaving enough space between them that the central color division remains visible.
Optional Cheeks
Add a few small pink stitches below the eyes if desired.
Use gentle embroidery tension. Pulling firmly can create indentations or distort the joining seam.
Secure and bury all embroidery ends.
Reinforced Keychain Loop
Choose a position at the top of the body near the color division, clear of the rays.
Use yellow or cream yarn to suit the attachment area.
Make the Loop
Join yarn through both loops of a selected body stitch.
Ch 6.
Sl st into a nearby body stitch, approximately two stitch positions away, to form a small arch.
Ch 1 and turn to work back along the arch.
Work 1 sc into each of the six foundation chains, starting with the chain nearest the second attachment point. Do not work into the turning ch-1.
Sl st into the original attachment point.
Count: 6 sc along the reinforced loop.
Fasten off with a sewing tail.
Use the tails to reinforce both ends against several neighboring body stitches. Secure and bury the ends.
Attach the keychain hardware through the loop. If using an opening attachment ring, close it fully and check that its edges do not catch the yarn.
This loop is for a decorative charm, not a weight-bearing carrying strap.
Practical Tips for the Sun and Moon Amigurumi Keychain Pattern
Compare the Halves Before Filling
The 48-stitch edges provide a clear joining plan, but yarn thickness and tension still affect the physical fit.
Keep the Seam Consistent
Catch the same loops on both pieces throughout the join. Tightening some sewing stitches more than others can pull the color boundary out of shape.
Choose the Front Before Adding Details
The two-color division can be viewed from different angles. Establish the front first, then position the rays, expressions, and loop around that orientation.
Arrange All Eight Rays Together
Temporary placement helps reveal uneven spacing before any ray is permanently attached. Compare their angles as well as the gaps between them.
Spread the Hardware Attachment
Reinforce both loop ends across nearby stitches. Repeated passes through only one stitch can concentrate wear at that point.
Finishing and Care
Check the main seam, ray attachments, and loop for gaps or loose ends.
A gentle pull can reveal an insecure attachment, but it does not establish a durability or load rating. Inspect the yarn where it contacts the metal during use.
Follow the yarn and filling manufacturers’ care instructions. Remove the hardware before washing when practical and allow the interior to dry completely.
More Crochet Keychain Projects
For another sky-themed design, explore the Crochet Cloud Keychain Pattern, which uses a cloud motif and facial details.
For a different outline and construction, visit the Crochet Butterfly Keychain Pattern. Its contrasting wing sections offer another way to combine light and dark yarns.
Frequently Asked Questions
Does This Sun and Moon Amigurumi Keychain Pattern Require Color Changes Within a Round?
No. The yellow and cream halves are crocheted separately and then sewn together.
Is the Moon a Separate Crescent?
No. In this version, the cream half represents the moon. There is no additional crescent-shaped overlay.
Why Do Both Halves Finish with 48 Stitches?
The edges are joined one stitch to one stitch, giving 48 matched pairs around the seam.
Can I Change the Yarn Weight?
A different yarn and suitable hook will change the size and fabric. Use compatible yarns for both halves and compare their edges before assembly.
How Many Rays Should I Make?
Make eight. Position them along the yellow outer outline before sewing so you can adjust their spacing and leave room for the top loop.
Share Your Sun and Moon Charm
Record the yarn, hook, finished measurements, and any assembly adjustments when making this sun and moon amigurumi keychain pattern.
Share your color choices and construction observations in the comments. If a step needs clarification, mention the component and round or assembly stage.