This orange cat amigurumi crochet pattern combines a rounded head, a cream muzzle, and small paws in a seated kitten design. The head and body are crocheted as one continuous piece, while the ears, limbs, muzzle, and tail are made separately and sewn into position.
The face offers room for small personal touches. A pink embroidered nose and short stitched whiskers give the cream muzzle definition, while the angle of the ears helps establish the cat’s expression.
Before sewing the separate pieces, position them temporarily and view the kitten from the front and both sides. Small placement changes can make a noticeable difference without changing the crochet instructions.

Materials for the Orange Cat Amigurumi Crochet Pattern
- Super bulky chenille or plush yarn in orange.
- Matching-weight cream or pale yellow yarn for the muzzle.
- Smooth black yarn or embroidery thread for the eyes, mouth, and whiskers.
- Smooth pink yarn or embroidery thread for the nose.
- A 4.5 mm or 5 mm crochet hook as a starting option.
- Polyester fiberfill.
- A stitch marker.
- A yarn needle.
- Scissors.
This version uses an embroidered face.
Choose a hook that produces fabric without obvious stuffing gaps while remaining comfortable to work. Chenille yarns vary in thickness, even when their labels use the same weight category.
Finished size and yarn consumption depend on the materials and tension used. Measure the completed sample before planning packaging, clothing, or other accessories.
Skills and Pattern Notes
The orange cat amigurumi crochet pattern uses continuous rounds, increases, invisible decreases, and sewing through paired stitches.
- Do not join rounds unless instructed.
- Do not add beginning chains between continuous rounds.
- Mark the first stitch of every round.
- Work through both loops unless BLO is specified.
- Numbers in parentheses indicate the completed stitch count.
- Add filling gradually rather than forcing a large amount through a narrow opening.
For instructions such as “(3 sc, inc) six times,” work one sc into each of the next three stitches, then two sc into the following stitch. Repeat that complete sequence six times.
Abbreviations — US Crochet Terms
- MR: magic ring.
- ch: chain.
- sc: single crochet.
- inc: work 2 sc into one stitch.
- dec: invisible single crochet decrease.
- st / sts: stitch / stitches.
- BLO: back loop only.
- FO: fasten off.
To make an invisible decrease, insert the hook through the front loops of the next two stitches. Yarn over and pull through both front loops, then yarn over and pull through the remaining two loops on the hook.
For help distinguishing US and UK terminology, consult the Craft Yarn Council’s crochet abbreviation reference.
Orange Cat Amigurumi Crochet Pattern: Head and Body
Use orange yarn. Begin at the top of the head and work downward through the neck and body.
Shape the Head
- Round 1: Work 6 sc into a MR. (6)
- Round 2: Inc in every stitch. (12)
- Round 3: (1 sc, inc) six times. (18)
- Round 4: (2 sc, inc) six times. (24)
- Round 5: (3 sc, inc) six times. (30)
- Round 6: (4 sc, inc) six times. (36)
- Round 7: (5 sc, inc) six times. (42)
- Rounds 8–14: Sc in every stitch. (42 per round)
Rounds 8–14 comprise seven rounds without increases.
Mark the Face
Choose the front of the head.
Mark two eye positions between Rounds 11 and 12, leaving approximately eight stitch columns between their centers.
Use these as starting positions for the embroidered eyes. Check their alignment against the proposed muzzle placement before securing the embroidery.
You can embroider the eyes now, while the inside of the head is accessible, or after stuffing if you prefer to assess the rounded shape first.
Narrow the Head
- Round 15: (5 sc, dec) six times. (36)
- Round 16: (4 sc, dec) six times. (30)
- Round 17: (3 sc, dec) six times. (24)
Begin stuffing the head. Distribute the filling around the sides and face without stretching the stitches apart.
Neck and Upper Body
- Round 18: Working in BLO, sc in every stitch. (24)
- Round 19: Working through both loops again, repeat (3 sc, inc) six times. (30)
- Round 20: (4 sc, inc) six times. (36)
- Rounds 21–25: Sc in every stitch. (36 per round)
Working Round 18 into the back loops of Round 17 leaves the front loops of Round 17 unused around the neck transition.
Add filling around the neck and upper body, checking that the head is supported without overpacking the fabric.
Close the Body
- Round 26: (4 sc, dec) six times. (30)
- Round 27: (3 sc, dec) six times. (24)
- Round 28: (2 sc, dec) six times. (18)
Add the remaining body stuffing before the opening becomes smaller.
- Round 29: (1 sc, dec) six times. (12)
- Round 30: Dec six times. (6)
Fasten off, leaving a closing tail.
Thread the tail through the front loops of the remaining six stitches. Pull gently to close the opening, secure the yarn, and bury the tail inside the body.
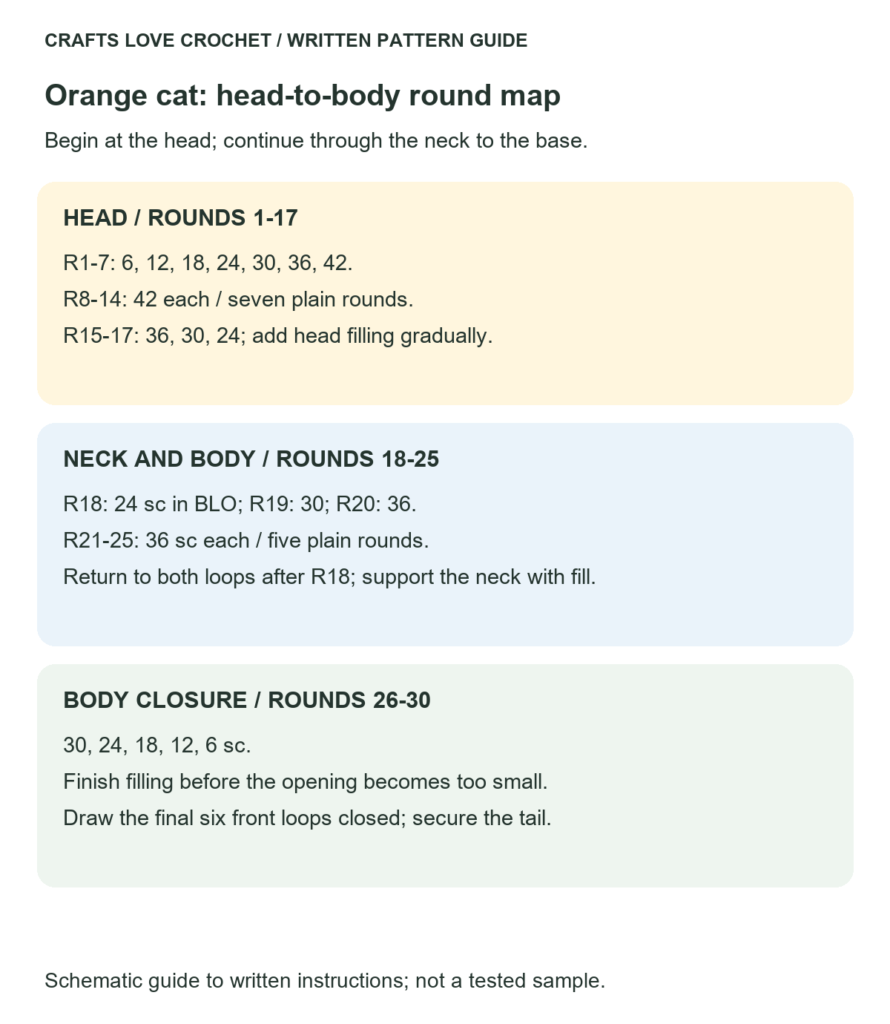
Visual Guide: Head-to-Body Round Counts
Follow the continuous piece from the top of the head through the neck and body, checking the round counts before stuffing and closing.
Open this guide at a larger size.
Cream Muzzle — Make Two Pieces
Use cream or pale yellow yarn.
- Round 1: Work 6 sc into a MR. (6)
- Round 2: Inc in every stitch. (12)
- Round 3: Sc in every stitch. (12)
Fasten off with a sewing tail. Leave the opening unclosed.
These small cups will be sewn open-edge-down against the head, with a little filling inside each.
Make both pieces before deciding their final position.
Ears — Make Two
Use orange yarn.
- Round 1: Work 6 sc into a MR. (6)
- Round 2: (1 sc, inc) three times. (9)
- Round 3: (2 sc, inc) three times. (12)
- Rounds 4–5: Sc in every stitch. (12 per round)
Do not stuff.
Flatten the opening so six stitches on one side line up with six stitches on the other.
Ch 1, then work 6 sc across the opening, inserting the hook through both loops of one front stitch and both loops of its corresponding back stitch for each sc.
The ch-1 does not count as a stitch. All 12 opening stitches are now joined into a six-stitch closed edge.
Fasten off with a sewing tail.
Arms — Make Two
Use orange yarn.
- Round 1: Work 6 sc into a MR. (6)
- Round 2: Inc in every stitch. (12)
- Rounds 3–6: Sc in every stitch. (12 per round)
Lightly stuff the lower portion. Leave the upper section soft enough to flatten.
Align the 12 opening stitches into six opposing pairs.
Ch 1, then work 6 sc through the paired stitches to close the opening.
Fasten off with a sewing tail.
Legs — Make Two
Use orange yarn.
- Round 1: Work 6 sc into a MR. (6)
- Round 2: Inc in every stitch. (12)
- Round 3: (1 sc, inc) six times. (18)
- Rounds 4–5: Sc in every stitch. (18 per round)
- Round 6: (1 sc, dec) six times. (12)
- Round 7: Sc in every stitch. (12)
Lightly stuff the rounded foot section.
Flatten the opening into six opposing stitch pairs. Ch 1, then work 6 sc through both layers.
Fasten off with a sewing tail.
Tail — Make One
Use orange yarn.
- Round 1: Work 6 sc into a MR. (6)
- Rounds 2–12: Sc in every stitch. (6 per round)
Leave the tail unstuffed for a flexible finish, or add a small amount of filling as you work.
Fasten off with a sewing tail. Leave the six-stitch opening available for attachment.
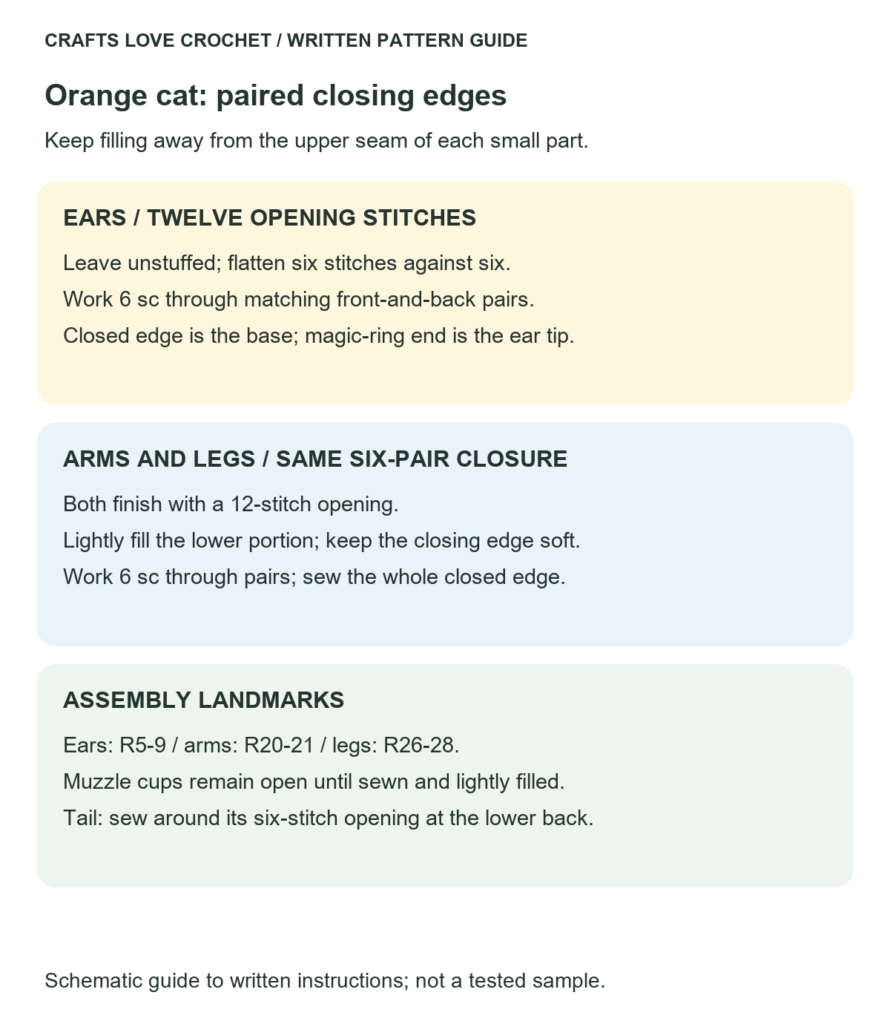
Visual Guide: Paired Edges and Attachment Points
Compare the paired closures with the open muzzle cups and tail before pinning the pieces to the body.
Open this guide at a larger size.
Assembling the Orange Cat Amigurumi Crochet Pattern
Position the Muzzle
Place the two cream pieces side by side below the eyes, with their inner edges touching at the center of the face.
Use approximately Head Rounds 12–16 as a placement area, adjusting the position to suit the actual size of your pieces.
Sew around the open edge of each muzzle piece. Before closing the final section, add a small amount of filling.
Finish the seams without pulling them so tightly that they create deep indentations.
Embroider the Nose and Mouth
Using pink yarn, embroider a small inverted triangle where the upper inner edges of the two muzzle pieces meet.
With black thread or yarn, add a short line below the nose. If desired, continue with two small outward curves for the mouth.
Keep the embroidery tension gentle enough to avoid compressing the cream pieces.
Add the Whiskers
Embroider three short lines on each side of the muzzle.
Work these as attached stitches rather than inserting loose strands. Secure and bury the thread ends.
Check both sides from the front before finishing.
Attach the Ears
Position the closed edges of the ears symmetrically on the upper sides of the head, within the area between Rounds 5 and 9.
The starting ring forms the tip of each ear; the six-stitch closed edge is its base.
Adjust the angle, then sew along the entire closed edge of each ear.
Attach the Arms
Position the closed edges at the front sides of the upper body, just below the neck, around Rounds 20–21.
Angle the arms slightly inward so the paws sit toward the front.
Sew across each closed edge, checking that both arms hang at a similar height.
Attach the Legs
Position the closed edges at the lower front sides of the body, around Rounds 26–28, with the rounded feet pointing forward.
Temporarily secure them and place the cat on a level surface.
Adjust the angles before sewing. Sitting balance depends on stuffing and placement as well as the crochet shape.
Sew the full closed edge of each leg to the body.
Attach the Tail
Place the open end at the lower center back, around Rounds 26–28.
Sew around all six opening stitches, attaching them to a small area of the body rather than gathering them into a single point.
Curve the tail toward one side. If you want it to remain in that position, add a few discreet stitches between the tail and the body.
Practical Tips for Plush Yarn
Feel for the Stitch Tops
When the pile obscures the stitches, use your fingertips to locate the next stitch before inserting the hook. Move the marker every round rather than relying on the appearance of the spiral.
Keep the Neck Accessible While Stuffing
Add and adjust the head filling before the lower body is closed. Check the neck transition from several angles so the head is not leaning because of uneven filling.
Count the Pairs Before Closing a Piece
An opening of 12 stitches forms six pairs when flattened. Each closing sc must pass through one stitch from each side.
This applies to the ears, arms, and legs.
Position Both Matching Pieces Together
Place both ears, both arms, or both legs before permanently sewing either one. Comparing the pair is easier than trying to match a second piece to a finished seam.
Avoid Pulling Sewing Tails Too Tightly
Tight attachment stitches can distort the face or body. Secure the pieces while allowing the underlying fabric to retain its shape.
Finishing and Care
Check all seams and weave in any remaining ends.
Shape the muzzle and paws gently with your fingers. Avoid brushing chenille unless the yarn manufacturer specifically recommends it; the pile and core construction vary between products.
Follow the care instructions for both the main yarn and the filling. Support the shape while drying and allow the inside to dry thoroughly.
More Animal Crochet Projects
For another feline-themed design, explore the Cat Keychain Strap Crochet Pattern. It takes the cat motif in an accessory direction rather than a seated plush figure.
If you enjoy assembling animal characters, the Little Duck with Floppy Hat Amigurumi Pattern offers a different silhouette, with a beak, feet, and a separate crocheted hat.
Frequently Asked Questions
Is This Orange Cat Amigurumi Crochet Pattern Suitable for Beginners?
The shaping uses basic single crochet, increases, and decreases. However, plush yarn can make counting difficult, and the separate pieces require careful sewing. Previous experience with a small amigurumi project is helpful.
Are the Head and Body Sewn Together?
No. They are worked continuously from the top of the head to the bottom of the body. Round 18 marks the neck transition.
How Many Stitches Close Each Ear?
Six sc. The 12 opening stitches are aligned into six opposing pairs, and one sc is worked through each pair.
Can I Use a Different Yarn?
Yes, but a different yarn and hook combination will change the dimensions, texture, and possibly the proportions. Use a similar thickness for the orange and cream pieces so the muzzle remains in proportion to the head.
Why Does My Cat Lean When Sitting?
Check the distribution of stuffing and the position of the legs. A rounded or overfilled base can affect balance. Adjust the temporary placement of the legs and tail before completing their seams.
Share Your Finished Kitten
Keep a note of the yarn, hook, and finished measurements when working through this orange cat amigurumi crochet pattern. Record any changes to the face or limb placement so you can reproduce the arrangement later.
Share your color choices and assembly observations in the comments. If you need clarification, mention the component and round number so the question is easy to follow.