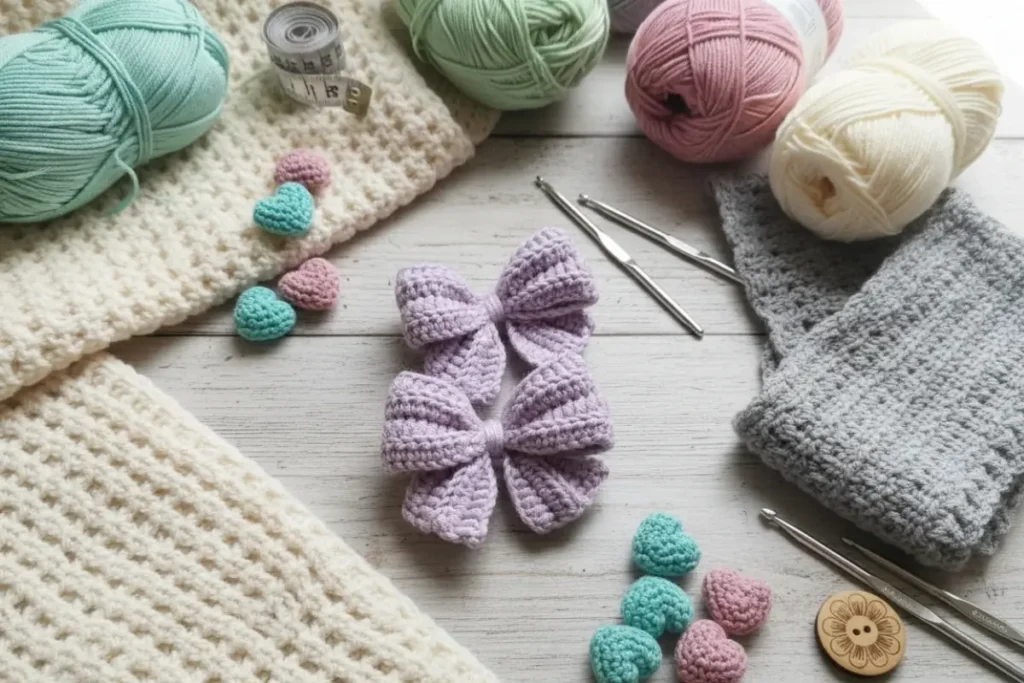
This crochet bow pattern quickly became one of my favorite small projects to make—and I’ve made quite a few of them by now. It’s one of those pieces that looks delicate and detailed but comes together faster than you’d expect. I’ve used it for hair clips, gift wrapping, and even as little accents on crochet bags.
What I love most is how adaptable it is. The first time I made it, I tested both cotton and acrylic yarn, and the difference in structure was noticeable right away. Cotton gave me that crisp, defined shape, while softer yarn created a more relaxed, flowy bow. Either way, it works beautifully.
If you’re looking for a project that feels satisfying without being overwhelming, this crochet bow pattern is a lovely place to start.

🧶 What You’ll Need
- Medium weight yarn (Category 4) or cotton yarn for better definition
- Crochet hook: 4.0 mm (G/6)
- Yarn needle
- Scissors
📏 Gauge (Not Critical)
14 sc x 16 rows = 4” (10 cm)
✂️ Abbreviations (US Terms)
- ch = chain
- sc = single crochet
- hdc = half double crochet
- dc = double crochet
- sl st = slip stitch
- st(s) = stitch(es)
- inc = increase (2 sts in same stitch)
🧩 Pattern Instructions
🎀 Bow Center (Make 1)
Ch 6
Row 1: sc in 2nd ch from hook and across (5 sts)
Rows 2–8: ch 1, turn, sc across (5 sts)
Fasten off, leave long tail for wrapping
👉 This piece will be used to wrap and secure the bow.
🎀 Bow Wings (Make 2)
Ch 13
Row 1:
dc in 3rd ch from hook, dc across (11 sts total)
Row 2:
ch 2, turn, hdc across
Row 3:
ch 2, turn, (dc, dc, inc) repeat across
Row 4:
ch 1, turn, sc across
Row 5 (texture row):
ch 2, turn, (dc cluster or puff stitch optional) across
Edge shaping (important for scallop look):
Continue working around the piece:
(sc, hdc, 3 dc in next st) repeat along edges to create rounded scallops
Fasten off
👉 Make 2 identical pieces
🎀 Tails (Make 2)
Ch 16
Row 1:
dc in 3rd ch from hook, dc across
Row 2:
ch 2, turn, hdc across
Row 3 (lace effect):
ch 2, (dc, ch 1, skip 1) repeat
Row 4:
ch 1, sc across
Edging:
Work (sc, hdc, 3 dc) along sides to create scalloped edges
Fasten off
🧵 Assembly
- Place the two wings side by side, slightly overlapping
- Position the tails underneath, centered
- Pinch the center tightly to form the bow shape
- Take the center strip and wrap it firmly around the middle
- Sew securely on the back using yarn needle
🪡 My Experience & Practical Tips
After making this crochet bow pattern multiple times, a few small details really made a difference in the final result:
- Watch your tension on the wings: If your stitches are too tight, the bow won’t “open” nicely. I like to relax my grip slightly when working the dc rows.
- Don’t skip blocking (even lightly): Especially if you’re using cotton yarn, a quick steam or gentle shaping helps those scalloped edges really stand out.
- Stuffing isn’t needed—but shaping is: Instead of adding filling, I focus on how tightly I pinch and wrap the center. That alone gives it structure.
- Beginners often rush the edging: The scalloped edge is what gives this bow its charm. Take your time here—it’s worth it.
- Yarn choice changes everything: Cotton = crisp and structured. Acrylic = softer and more relaxed. Try both to see what suits your style.
✨ Finishing Touches
- Block lightly for a cleaner shape
- Use cotton yarn for a crisp, structured look
- Add a clip or elastic on the back for hair accessory use
💡 Tips & Variations
This crochet bow pattern is incredibly versatile:
- Make it smaller with lighter yarn for baby accessories
- Use velvet yarn for a plush, luxurious feel
- Add beads or a charm in the center for a decorative touch
- Turn it into a brooch, hair clip, or even a bag embellishment
❓ FAQ (Schema Style)
Q: Is this crochet bow pattern beginner-friendly?
A: Yes! If you’re comfortable with basic stitches like sc, hdc, and dc, you’ll be able to follow this pattern easily.
Q: What is the best yarn for this crochet bow pattern?
A: Cotton yarn gives the best definition, but acrylic works well for a softer finish.
Q: Can I resize the bow?
A: Yes, changing yarn weight and hook size will naturally adjust the final size.
Q: How long does it take to make one bow?
A: On average, about 30–60 minutes depending on your speed and experience.
If you’d like to explore a few more creative ideas in this same cozy style, there are some beautiful options to try next. The Sun & Moon Amigurumi Keychain is perfect if you enjoy making pieces with a bit of meaning and symbolism—great for thoughtful handmade gifts. The Crochet Flower Pattern adds a soft, decorative touch and works wonderfully as an embellishment on other projects. And for something quick and relaxing, the Crochet Cloud Keychain Pattern is a sweet little make that’s ideal for keychains, bag charms, or small gifts.
💬 Conclusion
I’ve made this crochet bow pattern enough times to confidently say it’s one of those projects you’ll keep coming back to. It’s reliable, adaptable, and always turns out charming—whether you’re making it for yourself, as a gift, or even to sell at craft fairs.
There’s something special about turning a bit of yarn into something this pretty and versatile. And once you make your first one, it’s hard not to start imagining all the color combinations you want to try next.
Loved this pattern? Share it with your crochet friends! 🧶✨