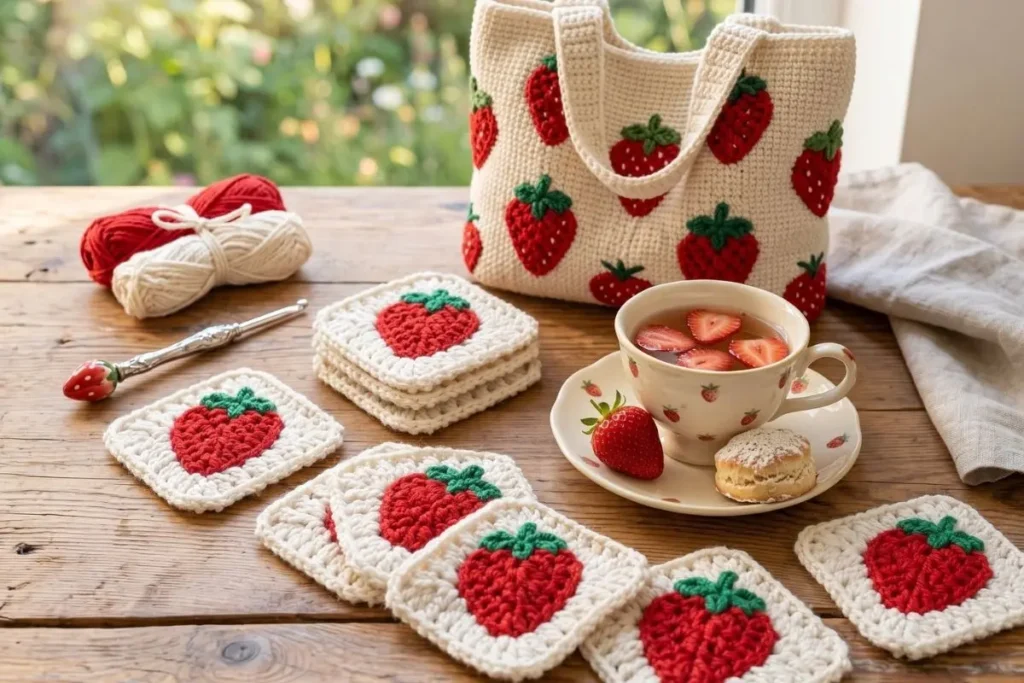
There’s something so satisfying about crocheting a bag that is both practical and full of personality, and this Strawberry Garden Tote Bag Crochet Pattern quickly became one of my favorite projects to make. I tested this design using worsted-weight cotton yarn because I wanted a tote that could comfortably hold everyday essentials without losing its shape after regular use.
One thing I noticed while making several samples is that keeping an even tension throughout the body creates beautifully straight sides, while the cotton yarn gives the finished bag a firm structure without feeling stiff. The cheerful strawberry appliqués add just the right amount of color, making this tote perfect for farmers’ markets, library visits, beach days, or simply brightening up your everyday errands.
If you enjoy combining decorative crochet with functional accessories, this project offers a wonderful balance of both. The sturdy construction, classic shape, and playful strawberries make it a bag you’ll enjoy carrying season after season.
What You’ll Need
Skill Level
Intermediate
Finished Size
Approximately 15 in (38 cm) wide × 13 in (33 cm) tall (without handles)
Materials
Yarn
Worsted Weight Cotton (#4)
- Color A – Natural (400–500 g)
- Color B – Strawberry Red (80 g)
- Color C – Leaf Green (40 g)
Hook
- 3.5 mm (E/4)
Notions
- Stitch markers
- Scissors
- Yarn needle
- Measuring tape
Gauge
22 sc × 24 rows = 4″ (10 cm)
Gauge is important to obtain the correct bag size.
Abbreviations (US Terms)
- ch – chain
- sl st – slip stitch
- sc – single crochet
- hdc – half double crochet
- dc – double crochet
- tr – treble crochet
- inc – 2 sc in same stitch
- dec – single crochet decrease
- BLO – back loop only
- FLO – front loop only
- st(s) – stitch(es)
- sp – space
- RS – right side
- WS – wrong side
- rep – repeat
- FO – fasten off
Pattern Notes
Before getting started, take a few minutes to read through the pattern from beginning to end. Understanding how each section fits together makes the entire project much more enjoyable.
- The bag is worked from the bottom upward.
- The base is crocheted first.
- The body is worked continuously in joined rounds.
- Strawberry appliqués are sewn on after blocking.
- Handles are crocheted separately and sewn securely.
Step-by-Step Pattern
Bag Base
Using Color A
Ch 51
Round 1
Sc in 2nd ch from hook.
Sc in next 48 sts.
3 sc in last chain.
Working on opposite side:
Sc 49.
3 sc in last st.
Join.
(104 sts)
Round 2
Ch 1.
Sc around.
Work 3 inc at each rounded end.
Join.
(116 sts)
Round 3
Ch 1.
Sc around.
Increase evenly at both ends.
Join.
(128 sts)
Round 4
Sc BLO around.
Join.
(128 sts)
The BLO round creates a clean fold for the bag sides.
Bag Body
Continue with Color A.
Rounds 5–60
Sc in each stitch around.
Join every round.
(128 sts)
The bag should measure approximately 13 inches tall.
Top Edge
Rounds 61–64
Sc evenly around.
Join.
FO.
Handles (Make 2)
With Color A
Ch 81.
Row 1
Sc in second chain from hook.
Sc across.
(80)
Rows 2–6
Ch 1.
Turn.
Sc across.
FO leaving a long tail.
Each handle measures approximately 20 inches.
Original Strawberry Appliqué
Make 12–14
Using Red
Round 1
Magic Ring.
Ch 1.
6 sc inside ring.
Join.
(6)
Round 2
Ch 1.
Inc around.
Join.
(12)
Round 3
(Sc, inc) around.
Join.
(18)
Round 4
Sc around.
Join.
(18)
Round 5
(2 sc, inc) around.
Join.
(24)
Shape
Row 1
Flatten piece.
Sc 10.
Turn.
Row 2
Dec.
Sc 6.
Dec.
Turn.
Row 3
Sc across.
Turn.
Row 4
Dec.
Sc 4.
Dec.
FO.
This forms the upper indentation of the strawberry.
Strawberry Seeds
Using cream embroidery floss
Embroider small vertical satin stitches randomly across the berry.
Approximately 12–16 seeds per strawberry.
Leaves
Using Green
Make a Magic Ring.
Work:
(Ch 4, sl st in second ch from hook, sc, hdc, sl st into ring)
Repeat 5 times.
Pull ring closed.
FO leaving sewing tail.
Sew to top of strawberry.
Assembly
Arrange strawberries evenly.
Suggested placement:
- Four across upper section
- Four across center
- Four across lower section
Leave approximately 2½–3 inches between motifs.
Sew securely using whip stitch.
Attach Handles
Position handles:
4 inches from each side seam.
Sew using several rows of whip stitches.
For extra durability:
- Stitch around entire handle base twice.
- Add an “X” reinforcement across each attachment point.
Optional Lining
A cotton fabric lining is highly recommended.
Benefits
- Prevents stretching
- Supports heavy items
- Protects crochet stitches
- Gives a professional finish
Blocking
Lightly steam block.
Do not press directly with the iron.
Allow to dry completely before attaching the lining.
Care Instructions
- Hand wash only.
- Lay flat to dry.
- Do not bleach.
- Do not tumble dry.
My Experience & Practical Tips
After making this bag more than once, I found that small details during construction make a noticeable difference in the finished result.
One of the biggest improvements came from checking the gauge before starting. Cotton yarn has very little stretch, so even a slightly loose tension can make the bag grow larger than expected. If your stitches feel loose, try adjusting your hook size before committing to the full project.
When sewing on the strawberry appliqués, I like to pin every motif in place first and step back to look at the overall layout. It’s much easier to adjust the spacing before stitching than after everything has been sewn down.
The handles deserve a little extra attention because they carry all the weight. Sewing them securely with multiple rows of stitching, followed by the reinforced “X” at each attachment point, creates a bag that feels dependable even when carrying books or groceries.
Finally, don’t rush the blocking process. Let the bag dry completely before adding the lining or attaching the appliqués. A properly blocked bag keeps its shape beautifully and gives the finished project a polished, handmade look.
If you enjoy adding decorative details to your crochet projects, you might also love making a Crochet Frilly Heart Appliqué Pattern for sweet embellishments or trying the Crochet Apple Slice Appliqué Pattern to create more playful accessories. And if you’re in the mood for amigurumi, the Original One-Eyed Alien Amigurumi Crochet Pattern is a fun project that uses many of the same neat finishing techniques.
Finishing Touches
Once all the strawberries are attached and the handles are reinforced, take a final look over your stitches and weave in every yarn end securely. Adding the optional cotton lining gives the tote extra strength for everyday use while helping it keep its beautiful shape over time.
This Strawberry Garden Tote Bag Crochet Pattern is designed to be both charming and practical, making it a wonderful companion for shopping trips, picnics, craft fairs, or simply carrying your daily essentials.
If you enjoyed decorating this tote with cheerful appliqués, you may also love making the Crochet Frilly Heart Appliqué Pattern, which is perfect for adding sweet handmade accents to bags, blankets, and gifts. Looking for a fun amigurumi project next? The Crochet Little Alien Amigurumi is a playful companion piece that’s enjoyable to crochet and makes a wonderful handmade gift. And if you’re already planning your next seasonal project, don’t miss the Crochet Star Snowflake Wreath Ornament, a beautiful decoration that brings the same creative charm to your holiday décor.
Frequently Asked Questions
Is this Strawberry Garden Tote Bag Crochet Pattern suitable for beginners?
The construction itself is straightforward, but because it includes shaping, appliqués, and assembly, it is best suited for intermediate crocheters or confident beginners looking for a rewarding challenge.
Can I use acrylic yarn instead of cotton?
Cotton yarn is recommended because it provides the structure needed for a sturdy tote. Acrylic yarn will produce a softer bag that may stretch more with use.
Do I really need to add a fabric lining?
While optional, a lining helps prevent stretching, supports heavier items, and extends the life of your crochet bag.
How many strawberry appliqués should I make?
The pattern recommends making 12–14 strawberries, allowing you to customize the final arrangement while maintaining a balanced look.
Can I wash the finished bag?
Yes. Hand washing with mild detergent and laying it flat to dry will help preserve both the shape and the appliqués.
Conclusion
This Strawberry Garden Tote Bag Crochet Pattern is one of those projects that feels just as enjoyable to use as it is to make. After testing the design with cotton yarn and carrying it on everyday outings, I found it to be sturdy, comfortable, and surprisingly spacious. The combination of a structured tote with cheerful strawberry appliqués creates a timeless accessory that always attracts compliments.
Whether you’re crocheting it for yourself, preparing handmade gifts, or adding something special to your next craft fair collection, this bag offers the perfect blend of beauty and everyday function. Take your time with the finishing details, enjoy the creative process, and you’ll have a tote you’ll be proud to carry for many seasons.
Loved this pattern?
If you enjoyed making this Strawberry Garden Tote Bag Crochet Pattern, share it with your crochet friends and inspire someone else to create their own handmade strawberry tote. Happy crocheting! 🍓🧶