There’s something timeless about a string of handmade daisies gently draped across a wall, shelf, or nursery. This Daisy Garland Crochet Pattern is one of those projects that instantly brightens a space while remaining wonderfully relaxing to make.
I’ve always loved floral crochet projects because they work up quickly and bring so much personality to a room. When testing garlands like this, I found that using cotton yarn helps the petals keep their shape beautifully, especially after blocking. The finished result feels light, elegant, and versatile enough for everything from seasonal decorating to wedding displays and thoughtful handmade gifts.
Whether you’re creating a cozy spring display, decorating a craft booth, or simply looking for a satisfying weekend project, this crochet daisy garland offers a lovely balance of simplicity and visual impact.
Why You’ll Love This Daisy Garland Crochet Pattern
- Adjustable length to suit any space
- Beautiful combination of flowers, leaves, and vine details
- Beginner-friendly construction
- Perfect for spring and summer decorating
- Great for nurseries, weddings, and seasonal displays
- Easy to customize with different flower arrangements
Finished Measurements
Garland length: Adjustable
Sample shown: Approximately 60–80 cm (24–32 inches)
Large daisy diameter: 8–9 cm (3–3.5 inches)
Small daisy diameter: 5–6 cm (2–2.5 inches)
What You’ll Need
Yarn
Center
DK or Light Worsted Weight (#3)
Color A – Golden Yellow
Petals
Color B – White
Vine and Leaves
Color C – Sage Green
Hook
2.75 mm to 3.5 mm crochet hook
Additional Supplies
- Yarn needle
- Scissors
- Measuring tape
- Blocking mat and pins (recommended)
Gauge
Gauge is not critical for this decorative project.
The sample flowers measure:
Small Daisy: 5–6 cm (2–2.5″)
Large Daisy: 8–9 cm (3–3.5″)
Abbreviations (US Terms)
| Abbreviation | Meaning |
|---|---|
| ch | chain |
| sl st | slip stitch |
| sc | single crochet |
| hdc | half double crochet |
| dc | double crochet |
| tr | treble crochet |
| st | stitch |
| sp | space |
| rep | repeat |
| rnd | round |
| MR | magic ring |
| FO | fasten off |
Step-by-Step Pattern Instructions
Daisy Flower – Small Version
Center
With Yellow Yarn:
Round 1
MR, work 12 sc into ring.
Join with sl st to first sc.
(12 sc)
Round 2
Ch 1.
Work 2 sc in each st around.
Join with sl st.
(24 sc)
FO.
Petals
Join White Yarn to any stitch.
Petal Round
Each petal is worked into one stitch.
Petal:
Ch 6
Sc in 2nd ch from hook
Hdc in next ch
Dc in next 2 ch
Hdc in last ch
Sl st into same base stitch
Skip next stitch.
Repeat Petal around.
You should create approximately 12 petals.
FO.
Daisy Flower – Large Version
Center
With Yellow Yarn:
Round 1
MR, 12 sc.
Join.
(12 sc)
Round 2
Ch 1.
2 sc in each st around.
Join.
(24 sc)
Round 3
Ch 1.
Sc in next st, 2 sc in next st.
Repeat around.
Join.
(36 sc)
FO.
Petals
Join White Yarn.
Petal
Ch 8
Sc in 2nd ch from hook
Hdc in next ch
Dc in next 3 ch
Hdc in next ch
Sc in last ch
Sl st into same base stitch
Skip next stitch.
Repeat around.
You should have approximately 18 petals.
FO.
Leaf
Make as many as desired.
With Green Yarn:
Round 1
Ch 10.
Working along one side:
Sc in 2nd ch from hook
Hdc in next 2 ch
Dc in next 4 ch
Hdc in next ch
Sc in last ch
Work 3 sc in final chain.
Continue along opposite side:
Sc in next st
Hdc in next st
Dc in next 4 st
Hdc in next 2 st
Sc in last st
Join with sl st.
FO leaving a long tail.
Continuous Vine
With Green Yarn:
Foundation
Ch 40–50.
This creates the starting vine section.
Attaching First Flower
Position flower at desired location.
Using yarn needle and green yarn:
Sew flower securely to vine.
Vine Section Between Flowers
After attaching a flower:
Ch 15–25
Attach next flower.
Continue alternating:
Flower
Ch 15–25
Flower
Ch 15–25
until desired length is reached.
Adding Leaves During Construction
At any point along the vine:
Leaf Branch
Ch 5
Join a completed leaf using sewing tail.
Return to vine with sl st.
Continue chaining vine.
Place leaves irregularly for a natural appearance.
Suggested placement:
1–3 leaves between flowers
Alternate sides of vine
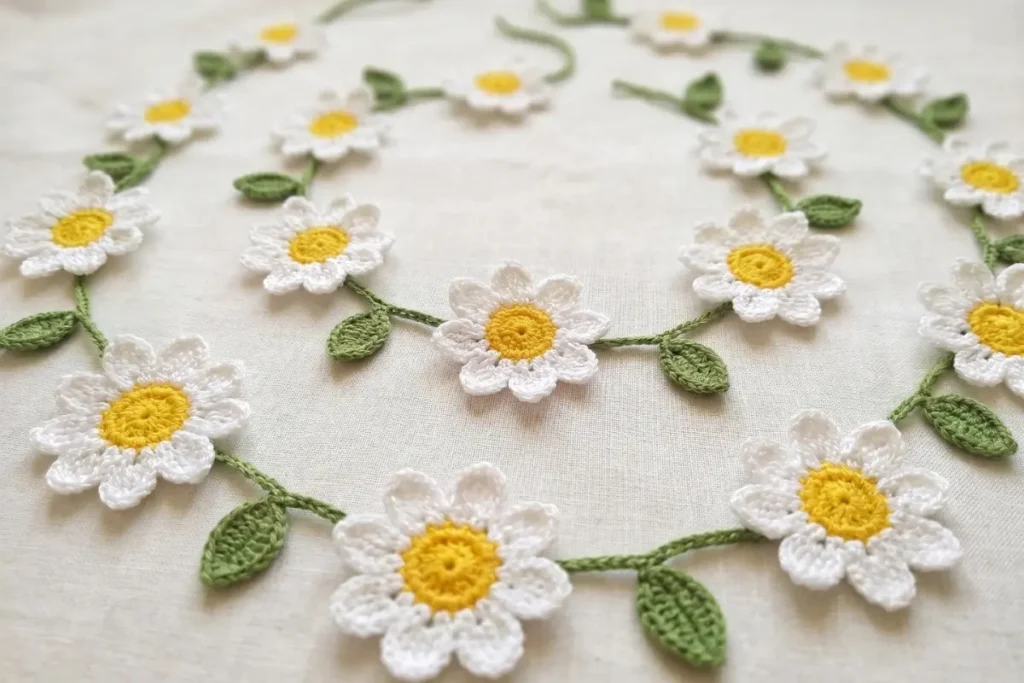
Suggested Garland Layout
For a garland similar to the photo:
- 4 Large Daisies
- 5 Small Daisies
- 12–16 Leaves
- Vine length: 70–90 cm (28–35″)
Alternate flower sizes:
Small → Large → Small → Large → Small → Large
This creates the flowing botanical effect seen in the image.
Blocking
For best results:
- Lightly mist flowers.
- Pin petals individually.
- Shape leaves.
- Allow to dry completely.
Blocking dramatically improves petal definition and gives the garland its elegant drape.
My Experience & Practical Tips
After making several floral garlands over the years, I’ve learned that a few small details can make a huge difference in the finished look.
Keep your tension consistent. Uneven tension tends to show up most clearly in flower petals. If some petals appear larger than others, slightly relaxing your grip on the yarn often helps.
Don’t skip blocking. This is probably the biggest transformation step. The flowers may look a little curled immediately after crocheting, but once blocked, the petals open beautifully and the entire Daisy Garland Crochet Pattern looks more polished.
Use cotton yarn for crisp petals. While acrylic works perfectly well, cotton provides sharper stitch definition and helps flowers hold their shape longer.
Leave generous sewing tails. Attaching flowers and leaves becomes much easier when you have enough yarn to work with. Short tails can make assembly unnecessarily frustrating.
Avoid overcrowding the vine. It’s tempting to add flowers close together, but leaving breathing room between blooms creates the graceful, flowing appearance that makes this garland so charming.
Pattern Notes
- Cotton yarn produces the crispest petals.
- Acrylic yarn creates a softer, more romantic look.
- Add pearl beads to flower centers for a decorative variation.
- Multiple garlands can be layered together for wall décor, wedding backdrops, nursery decoration, or seasonal spring displays.
Tips & Variations
One of the best things about this Daisy Garland Crochet Pattern is how easy it is to personalize.
- Create a longer garland for mantels and party décor.
- Mix pastel flower colors for a whimsical spring look.
- Use only small flowers for a delicate appearance.
- Use mostly large flowers for a fuller botanical display.
- Layer multiple garlands together to create a statement wall hanging.
Finishing Touches
Once all flowers and leaves have been attached, take a moment to arrange them naturally along the vine. Slightly adjusting the placement of leaves and flowers can dramatically improve the finished appearance.
A final round of gentle blocking will help everything settle into place and give your garland a professional finish.
FAQ
Is this Daisy Garland Crochet Pattern beginner-friendly?
Yes. The project uses basic crochet stitches and simple assembly techniques, making it suitable for adventurous beginners.
Can I use different yarn weights?
Yes, but the finished flower sizes will vary depending on the yarn and hook combination used.
Do I have to block the flowers?
Technically no, but blocking greatly improves the shape and appearance of the petals.
How long should the garland be?
The vine is completely adjustable, allowing you to create a garland that suits your available space.
Can I make this as party or wedding décor?
Absolutely. The lightweight floral design makes it ideal for weddings, baby showers, spring parties, and nursery decorations.
Internal Link Suggestions
If you enjoyed making this Daisy Garland Crochet Pattern, there are several floral crochet projects that pair beautifully with it. For a cheerful and sunny addition to your crochet collection, the Sunflower Crochet Appliqué Pattern is a wonderful choice. These bright appliqués can be used to decorate bags, blankets, hats, or even combined with your daisy garland for a vibrant garden-inspired display.
For crocheters who love dimensional flowers, the Tulip Flower in Pot Amigurumi Crochet Pattern offers a charming way to create a lasting bouquet that never needs watering. Its decorative design makes it perfect for gifting, desk décor, or adding a handmade touch to your home.
Another delightful project to explore is the Cute Tulip Pot Amigurumi Crochet Pattern. With its adorable character and playful style, it complements floral garlands beautifully and makes a lovely handmade gift for birthdays, Mother’s Day, teachers, or anyone who appreciates crochet flowers.
Conclusion
This Daisy Garland Crochet Pattern is one of those projects that feels special from the very first flower to the final leaf. The design has been carefully tested to create a balanced arrangement that looks beautiful whether displayed in a nursery, craft room, seasonal display, market booth, or special event setting.
What I love most is how versatile it is. You can make a short garland for a shelf, create a dramatic wall display by joining several together, or even use the individual flowers for other decorative projects. However you choose to display it, the finished piece brings a touch of handmade charm that never goes out of style.
Loved this pattern? Share it with your crochet friends and inspire someone else to create their own blooming crochet garland.