There is something timeless about crocheted flowers. They bring color, charm, and warmth into any space, and unlike fresh flowers, they stay beautiful all year long. This Tulip Flower in Pot Amigurumi Crochet Pattern is one of those projects that instantly brightens a desk, bookshelf, craft room, or gift basket.
I’ve made several versions of this tulip using different cotton yarns, and one thing I noticed during testing is that using a slightly smaller hook creates a much cleaner flower shape with crisp stitch definition. The finished tulip works wonderfully as a decorative piece, but it also makes a thoughtful handmade gift for birthdays, Mother’s Day, teacher appreciation gifts, or spring celebrations.
The project combines simple amigurumi techniques with elegant shaping details that give the tulip its distinctive appearance. While it’s designed for intermediate crocheters, confident beginners who are familiar with basic stitches can absolutely enjoy making it as well.
Whether you’re creating a single flower or planning an entire bouquet, this crochet tulip is a delightful project you’ll want to make again and again.
What You’ll Need
Materials
- Cotton yarn:
- Red (flower)
- Green (stem and leaf)
- Beige or light brown (pot)
- 2.0–2.5 mm crochet hook
- Polyester fiberfill
- Floral wire (18–20 gauge)
- Floral tape or green yarn for wrapping stem
- Yarn needle
- Stitch marker
- Scissors
- Small pebble or weighted filling (optional)
Abbreviations (US Terms)
- MR = Magic Ring
- ch = chain
- sc = single crochet
- inc = increase (2 sc in same stitch)
- dec = invisible decrease
- sl st = slip stitch
- st = stitch
- sts = stitches
- BLO = back loop only
- FO = fasten off
Tulip Flower in Pot Amigurumi Crochet Pattern
Flower Head
Work in continuous rounds.
Round 1
6 sc in MR (6)
Round 2
Inc in each st around (12)
Round 3
(1 sc, inc) × 6 (18)
Round 4
(2 sc, inc) × 6 (24)
Rounds 5–9
Sc around (24)
Round 10
(2 sc, dec) × 6 (18)
Lightly stuff.
Round 11
(1 sc, dec) × 6 (12)
Round 12
Sc around (12)
Do not overstuff. The tulip should maintain a slightly rounded shape.
FO leaving a long tail.
Creating the Tulip Shape
Thread the yarn tail onto a yarn needle.
Insert the needle through the center of the flower base and bring it out through the top edge between two stitches.
Pull gently to create the first petal division.
Repeat directly opposite the first division to create a second section.
Pull firmly enough to create the characteristic tulip shape shown in the photo.
Secure the yarn inside the flower.
Stem
Using green yarn.
Round 1
6 sc in MR (6)
Rounds 2–18
Sc around (6)
Do not stuff.
Insert floral wire through the center of the stem.
Wrap the wire with floral tape if needed for extra stability.
FO leaving a long sewing tail.
Leaf
Using green yarn.
Row 1
Ch 11
Row 2
Starting in 2nd ch from hook:
1 sl st, 2 sc, 3 hdc, 3 sc, 1 sl st.
Working along opposite side of foundation chain:
1 sl st, 3 sc, 3 hdc, 2 sc, 1 sl st.
FO leaving a tail for sewing.
Flatten and gently shape the leaf with your fingers.
Pot
Using beige yarn.
Work in continuous rounds.
Round 1
6 sc in MR (6)
Round 2
Inc around (12)
Round 3
(1 sc, inc) × 6 (18)
Round 4
(2 sc, inc) × 6 (24)
Round 5
BLO sc around (24)
Rounds 6–10
Sc around (24)
Round 11
(6 sc, inc) × 3, 3 sc (27)
Round 12
Sc around (27)
Round 13
(8 sc, inc) × 3 (30)
Round 14
Sc around (30)
Round 15
Reverse sc (crab stitch) around entire rim
FO and weave in ends.
Pot Insert (Optional)
To help the flower stand upright:
Round 1
6 sc in MR (6)
Round 2
Inc around (12)
Round 3
(1 sc, inc) × 6 (18)
Round 4
(2 sc, inc) × 6 (24)
FO.
Place inside the pot base before assembly.
Assembly
Step 1
Sew the stem securely to the bottom center of the tulip.
Step 2
Attach the leaf approximately halfway down the stem.
Position it slightly angled upward as shown in the reference photo.
Step 3
Fill the pot lightly with stuffing.
For additional stability, place a small pebble or weight inside the base before adding stuffing.
Step 4
Insert the stem into the center of the pot.
Step 5
Secure the stem firmly with several stitches through the stuffing and inner base.
Step 6
Shape the flower, leaf, and pot rim until everything sits naturally.
My Experience & Practical Tips
After making several crochet flowers over the years, I’ve found that tiny details make a huge difference in the final appearance.
First, resist the temptation to overstuff the tulip bloom. Too much stuffing can stretch the stitches and make the flower lose its elegant tulip shape. A lightly stuffed flower looks much more realistic.
When inserting the floral wire, make sure it sits perfectly centered inside the stem. If it’s off-center, the flower may lean slightly once assembled.
If you’re a beginner, one common mistake is pulling the yarn too tightly while shaping the petal divisions. Pull firmly, but gradually. It’s much easier to add tension than to undo a distorted flower.
Mercerized cotton yarn gives the cleanest finish for this project. The stitch definition helps the flower, leaf, and pot look crisp and polished.
Finally, if you’re planning to display the tulip on a shelf or desk, adding a small pebble inside the pot makes a surprisingly big difference in stability.
Designer Notes
- Use mercerized cotton yarn for the cleanest stitch definition.
- A slightly smaller hook helps create the tight fabric needed for amigurumi.
- The tulip looks especially beautiful when made in red, pink, yellow, white, purple, or orange.
- For a bouquet, crochet several tulips in different colors and arrange them together in a larger decorative pot.
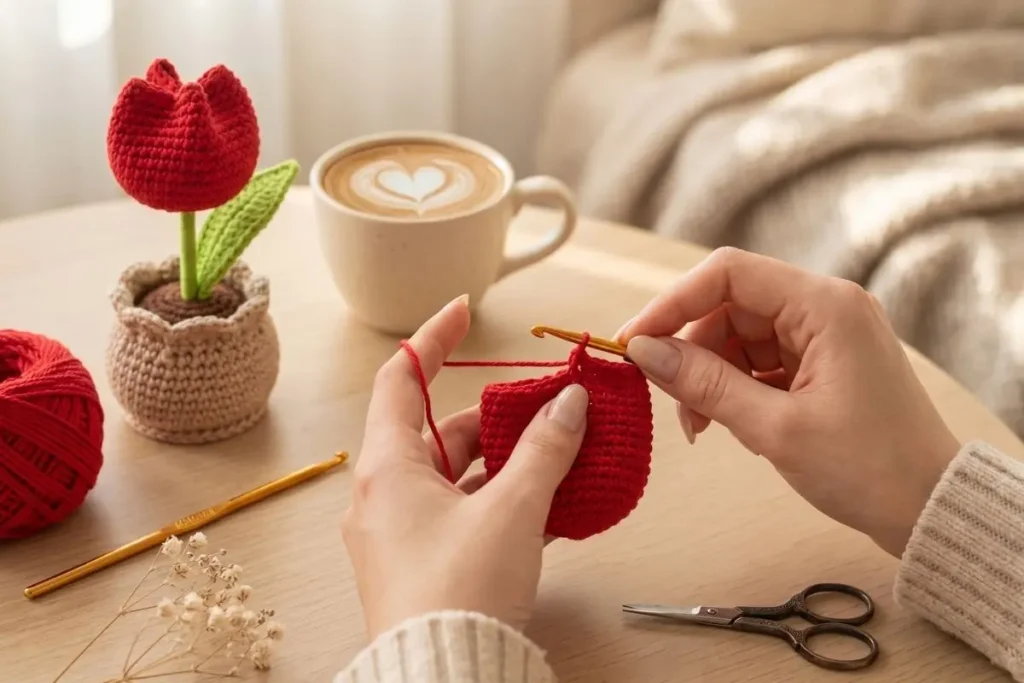
Your finished tulip should have the same minimalist, elegant appearance as the sample photo, featuring a rounded tulip bloom, slender stem, delicate leaf, and softly textured flower pot. 🌷
Tips & Variations
One of my favorite things about this Tulip Flower in Pot Amigurumi Crochet Pattern is how easy it is to customize.
- Create a bouquet using several flower colors.
- Make matching flowers for seasonal home decor.
- Use pastel shades for spring displays.
- Crochet multiple pots to decorate a workspace or craft room.
- Pair different flower patterns together for a handmade floral arrangement.
If you enjoy floral projects, you might also love exploring other amigurumi flowers and decorative crochet plants. They combine beautifully with this tulip for larger displays and gift sets.
Finishing Touches
Before displaying your finished flower, spend a few minutes adjusting the stem, leaf, and bloom position. Small adjustments create a much more natural appearance.
Gently shape the tulip petals with your fingers and ensure the leaf curves slightly upward. These finishing details help transform a simple crochet project into a decorative piece that looks professionally handmade.
FAQ
Is this Tulip Flower in Pot Amigurumi Crochet Pattern beginner-friendly?
The project is best suited for intermediate crocheters, but confident beginners who know basic amigurumi techniques can successfully complete it.
Can I use acrylic yarn instead of cotton?
Yes, although cotton yarn generally provides sharper stitch definition and a cleaner overall finish.
Why is my flower leaning?
Check that the floral wire is centered within the stem and that the pot contains enough weight or stuffing for support.
Can I make a bouquet?
Absolutely. Crocheting several tulips in different colors creates a beautiful decorative bouquet.
How tall is the finished tulip?
The finished size is approximately 4.5–5 inches (11–13 cm) tall.
If you enjoyed making this tulip project, you may also love the Cute Tulip Pot Amigurumi Crochet Pattern. It offers another charming floral design and pairs beautifully with this tulip when creating a handmade crochet flower collection for your home décor or gift baskets.
For crocheters who enjoy adorable character projects, the Fluffy Orange Cat Amigurumi Crochet Pattern is a wonderful next make. Its playful personality and soft, cuddly design provide a fun contrast to floral amigurumi and make an excellent handmade gift for cat lovers.
Looking for something sweet and whimsical? The Little Duck with Floppy Hat Amigurumi Pattern is a delightful choice. With its cute spring-inspired style, it complements the Tulip Flower in Pot Amigurumi Crochet Pattern perfectly and can be displayed together as part of a seasonal crochet decoration set.
This Tulip Flower in Pot Amigurumi Crochet Pattern is one of those small projects that delivers a surprisingly elegant result. After testing different yarns, stuffing amounts, and stem supports, I’ve found this design creates a lovely balance between simplicity and realism.
Whether you’re making one tulip as a thoughtful handmade gift, creating inventory for a craft fair, or decorating your own home, this little flower brings lasting charm without requiring a large time investment.
If you make your own version, don’t be afraid to experiment with colors and create a full bouquet. Every tulip turns out with its own unique personality, and that’s part of the joy of handmade crochet.
Loved this pattern? Share it with your crochet friends and inspire someone else to create their own blooming crochet garden!